Limited Time Special Offers Available Now!

How to Remove Green Algae From Vinyl Siding: A Safe Step-by-Step Guide

Green streaks and patches can make even well-maintained siding look dirty and neglected. If you are wondering how to remove green algae from vinyl siding, the good news is that most light algae growth can be cleaned without replacing your siding. 

The key is using a gentle cleaning method that removes the buildup without scratching, warping, or otherwise damaging the vinyl. 

For homeowners who need help with stubborn stains or aging siding, contact AAA Siding & Remodeling or call 816-421-5433 to discuss your home’s exterior with a professional.

What Causes Green Algae on Vinyl Siding?

Green algae on vinyl siding is usually associated with moisture and conditions that allow organic growth to remain on the surface. Areas that stay damp for long periods, receive limited sunlight, or are exposed to runoff can be more likely to develop green discoloration.

Algae may appear as:

  • Green streaks running down individual siding panels
  • Small green spots or patches
  • A thin film across larger sections of siding
  • Darker green or brownish stains that develop over time

Homes surrounded by trees may also see more organic debris collect on the siding. Leaves, pollen, dirt, and other material can hold moisture against the surface, creating conditions where algae and other organic growth can become more noticeable.

Algae is primarily an appearance and maintenance concern, but persistent moisture deserves attention. The U.S. Environmental Protection Agency emphasizes that moisture control is an important part of preventing mold growth and recommends addressing water problems rather than simply cleaning the visible growth.

If you are already dealing with significant exterior buildup, AAA’s guide on how to clean siding for every material is another useful resource.

How to Remove Green Algae From Vinyl Siding

How to Remove Green Algae From Vinyl Siding

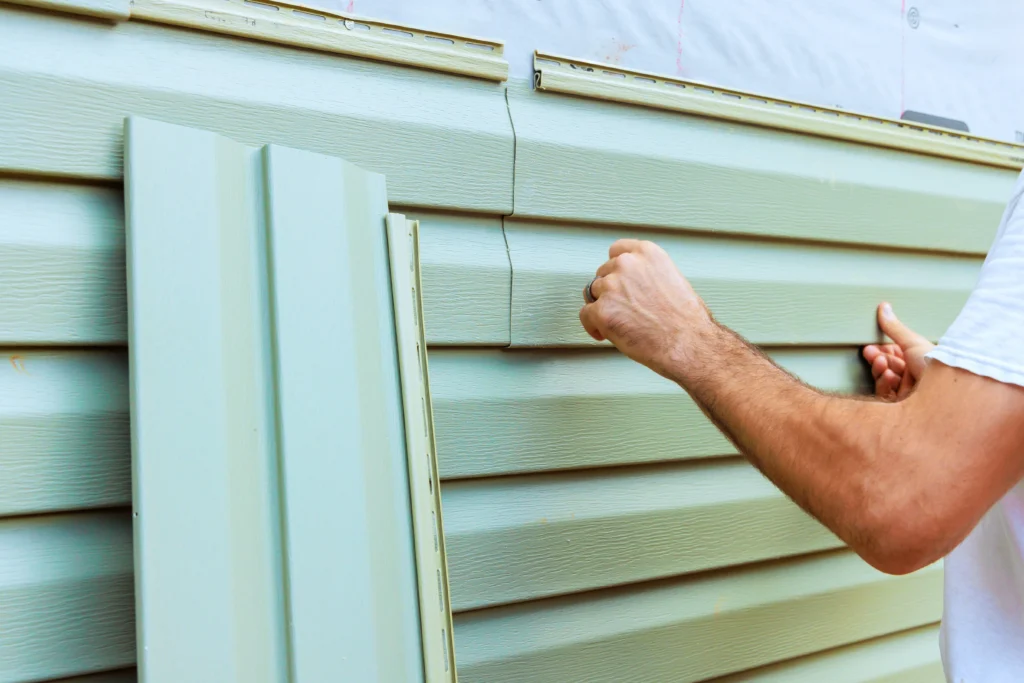
For light to moderate buildup, you can usually start with a simple cleaning approach. The goal of vinyl siding algae removal is to loosen the growth and rinse it away without relying on unnecessarily aggressive chemicals or tools.

1. Choose a Mild Cleaning Solution

Start with a bucket of water and a mild household detergent or a cleaner specifically labeled for vinyl siding. Follow the product manufacturer’s instructions if you use a commercial siding cleaner.

Avoid automatically reaching for the strongest chemical available. A stronger product is not necessarily better, and improper use can damage nearby landscaping, windows, trim, or other exterior materials.

If you are dealing with suspected mold rather than simple algae, review the EPA’s basic mold cleanup guidance before beginning.

2. Protect Nearby Plants and Exterior Features

Before you remove algae from vinyl siding, protect landscaping, outdoor furniture, decorations, and other items near the work area.

Move objects away from the wall when possible. Cover or thoroughly wet plants if appropriate for the cleaning product being used, and keep cleaning solutions away from electrical components and openings.

Also close windows and doors before rinsing the siding.

3. Rinse the Siding With a Garden Hose

A garden hose can remove loose dirt and debris before you begin scrubbing.

Work from the top of the siding downward so dirty water does not run over areas you have already cleaned. Use a steady stream rather than an unnecessarily forceful spray.

This first rinse can also help you determine how extensive the buildup is. Light algae stains on siding may begin disappearing before you even apply a cleaning solution.

4. Apply the Cleaning Solution

Apply your mild cleaning solution to a manageable section of siding. Working in smaller areas makes it easier to prevent the cleaner from drying on the surface.

For textured vinyl siding, give the solution enough time to loosen surface buildup, but follow the cleaner’s label instructions rather than allowing it to sit indefinitely.

5. Gently Scrub the Green Algae

Use a soft-bristled brush or non-abrasive cleaning pad to gently scrub the affected area.

Avoid aggressive scraping. Vinyl siding can be damaged by abrasive tools, and scratching the finish may leave the surface looking worse than the original algae.

When you clean algae off vinyl siding, use overlapping strokes and pay attention to the lower edges and grooves of the siding panels where dirt and organic material can collect.

6. Rinse Thoroughly

Once you have cleaned the section, rinse it thoroughly with clean water.

Again, start at the top and work downward. Make sure the cleaning solution and loosened algae are completely washed away.

If green discoloration remains, you may need to repeat the process rather than immediately switching to a much harsher chemical.

7. Let the Siding Dry and Inspect It

Allow the siding to dry completely before deciding whether another cleaning is necessary.

Some discoloration may be staining rather than active surface growth. If the siding remains stained after careful cleaning, repeated scrubbing may do more harm than good.

At that point, consider whether the siding itself is showing signs of age or damage.

How to Remove Green Algae From Vinyl Siding

How to Clean Vinyl Siding Without Damaging It

Knowing how to clean vinyl siding is just as important as knowing which product to use. Vinyl is designed to be relatively low maintenance, but improper cleaning techniques can still cause problems.

Keep these guidelines in mind:

  • Use soft brushes instead of abrasive tools.
  • Start with the gentlest effective cleaning method.
  • Test a cleaning solution on a small, inconspicuous area first.
  • Follow the cleaner manufacturer’s directions.
  • Rinse cleaning solutions completely.
  • Work from the top down.
  • Do not let cleaning solutions dry on the siding.
  • Protect nearby landscaping and exterior fixtures.
  • Avoid unnecessary pressure or aggressive scrubbing.

If you are considering a pressure washer, use caution. Excessive pressure or an improper spray angle can force water behind siding panels or damage the surface.

Can You Use Bleach to Remove Green Algae From Vinyl Siding?

Bleach is sometimes recommended for exterior algae, mold, and mildew stains, but homeowners should not assume that stronger is always safer or more effective.

For ordinary green algae on vinyl siding, it makes sense to begin with a gentler approach and follow the instructions for whichever product you choose.

If you do use a product containing bleach, carefully follow its label directions and take precautions to protect plants, people, pets, windows, gutters, and other exterior materials.

When in doubt, professional help is a safer choice than experimenting with increasingly aggressive cleaning chemicals.

How to Remove Green Algae From Vinyl Siding With a Pressure Washer

Pressure washing can make exterior cleaning faster, but more pressure is not necessarily better.

Vinyl siding is installed in overlapping panels, and water can potentially get behind siding when it is sprayed improperly. For that reason, homeowners should avoid concentrating a high-pressure stream directly into seams, edges, vents, or openings.

If you use a pressure washer:

  1. Follow the siding and pressure washer manufacturer’s recommendations.
  2. Begin with the lowest effective pressure.
  3. Keep the nozzle at an appropriate distance from the siding.
  4. Avoid spraying upward underneath siding panels.
  5. Keep the spray moving instead of concentrating it in one location.
  6. Rinse thoroughly afterward.

For extensive growth, difficult-to-reach areas, or multi-story homes, professional cleaning may be a better option.

How to Prevent Algae Stains on Siding

Cleaning your siding once is helpful, but preventing conditions that encourage recurring growth is even better.

To help reduce future algae stains on siding:

Keep Gutters and Downspouts Working Properly

Overflowing gutters can send water down the face of your siding. Keep gutters clear and make sure downspouts direct water away from the house.

Trim Vegetation Near the Home

Trees and shrubs that remain close to the siding can reduce airflow and limit sunlight. Keeping vegetation properly trimmed can help exterior surfaces dry more efficiently.

Watch for Water Problems

Persistent wet spots may indicate a drainage, gutter, roof, flashing, or other exterior issue. If one section of siding repeatedly develops algae while surrounding areas remain relatively clean, look for the source of the moisture.

Clean Siding Regularly

You do not have to wait until your siding is covered in green growth. Periodic cleaning can remove dirt, pollen, and organic debris before it becomes more difficult to clean.

When Should You Replace Vinyl Siding Instead of Cleaning It?

Cleaning can improve the appearance of siding, but it cannot fix siding that is damaged, warped, cracked, or failing.

If you have repeatedly tried to remove algae from vinyl siding and the same areas continue to develop heavy discoloration, consider whether moisture is getting behind the siding or whether the siding system is reaching the end of its useful life.

Signs that it may be time to have your siding professionally evaluated include:

  • Cracked or broken panels
  • Warped or buckled siding
  • Loose panels
  • Significant fading or deterioration
  • Repeated moisture problems
  • Staining that does not improve with appropriate cleaning
  • Multiple areas showing damage or excessive wear

How to Remove Green Algae From Vinyl Siding

Should You Repair or Replace Siding With Persistent Algae?

Persistent algae does not automatically mean that your siding needs to be replaced. In many cases, the underlying issue is simply that a section of the exterior stays damp.

Before replacing anything, inspect the area for obvious moisture sources. Check nearby gutters, downspouts, landscaping, roof runoff, hose bibs, and other sources of recurring water.

If the siding itself is damaged, however, cleaning will only address the appearance temporarily. Professional evaluation can help determine whether a localized siding repair is appropriate or whether a larger siding replacement project makes more sense.

Keep Your Vinyl Siding Looking Its Best

Learning how to remove green algae from vinyl siding can help restore your home’s curb appeal without immediately turning to siding replacement. 

For light buildup, a mild cleaning solution, soft brush, and thorough rinse are often a good place to start. Just remember that recurring algae can be a sign of excess moisture, so identifying the cause is an important part of long-term exterior maintenance.

When cleaning is no longer enough, damaged or aging siding may need professional attention. AAA Siding & Remodeling has served homeowners throughout the Kansas City metro area since 1998 and provides vinyl siding installation and replacement along with other exterior remodeling services. 

If you need help evaluating your siding, contact AAA Siding & Remodeling online or call 816-421-5433 to schedule a consultation.

Frequently Asked Questions About Vinyl Siding Algae

How often should I clean green algae from vinyl siding?

There is no universal schedule because algae growth depends on moisture, shade, landscaping, weather, and the home’s surroundings. Inspect your siding periodically and clean visible buildup before it becomes extensive.

What is the best way to remove green algae from vinyl siding?

For light growth, begin with water and a mild cleaning solution and gently scrub with a soft brush. Rinse thoroughly afterward. Avoid abrasive tools and excessive pressure.

Can green algae damage vinyl siding?

Algae is generally a surface appearance issue, but recurring growth can signal persistent moisture. If an area repeatedly becomes wet or stained, investigate the underlying cause instead of repeatedly cleaning the same spot.

Will pressure washing remove green algae from vinyl siding?

Pressure washing can remove surface buildup, but it must be done carefully. Excessive pressure or spraying underneath siding panels can cause damage or force water where it does not belong.

Why does algae keep coming back after I clean my siding?

Recurring growth is often related to moisture, shade, limited airflow, or runoff. Look for clogged gutters, overflowing downspouts, nearby vegetation, or another source that keeps the siding damp.

Should I replace my siding if cleaning does not remove the stains?

Not necessarily. Some stains may remain even after the growth has been removed. However, cracked, warped, loose, or extensively deteriorated siding should be professionally evaluated.

Related Topics
How to Get Paint Off Vinyl Siding: A Safe Step-by-Step Guide

Accidentally splattered paint on your home’s exterior? Learning how to get paint off vinyl siding can help restore your home’s appearance without damaging the siding underneath. 

Small paint drips and smears can often be removed with the right cleaning method, but aggressive scraping, abrasive tools, or harsh chemicals can create a bigger problem. 

If your siding is heavily stained, damaged, faded, or simply ready for an upgrade, AAA Siding & Remodeling can help. Contact AAA Siding & Remodeling or call 816-421-5433 to discuss your siding needs.

What You’ll Learn About How to Get Paint Off Vinyl Siding

Removing paint from vinyl siding does not always require replacing the affected panel. The best approach depends on the type of paint, how long it has been on the siding, and how much of the surface is affected.

In this guide, we’ll cover:

  • How to identify the type of paint on your siding
  • Supplies you can use for minor paint splatters
  • How to get paint off vinyl siding step by step
  • What to do about dried and stubborn paint
  • Which cleaning methods to avoid
  • When paint removal may not be the best solution
  • When siding replacement makes more sense
  • How to prevent paint from getting on siding during future projects

How to Get Paint Off Vinyl Siding Without Damaging It

Vinyl siding is designed to be relatively low maintenance, but that does not mean every cleaning method is safe. The Vinyl Siding Institute recommends using soft-bristled brushes and avoiding stiff brushes or abrasive cleaners that can change the siding’s finish.

Before beginning any paint removal from vinyl siding, start with the least aggressive method possible.

1. Identify the Paint Before You Remove Paint From Vinyl Siding

If you know what paint was used, check the paint can or product label. Water-based latex paint is generally easier to clean than oil-based paint.

Fresh latex paint may respond to water and mild soap, while dried paint may require more careful spot treatment. Oil-based paints can be more difficult to remove and may require a product specifically intended for the paint type.

Do not automatically reach for a powerful solvent. Some chemicals that remove paint can also damage vinyl, discolor the surface, or affect its finish.

If you are unsure what type of paint you are dealing with, test your cleaning method on a small, inconspicuous area first.

2. Gather Your Supplies

For small paint splatters, start with basic supplies rather than heavy-duty chemicals.

You may need:

  • Garden hose
  • Bucket of warm water
  • Mild household detergent
  • Soft cloth or sponge
  • Soft-bristled cleaning brush
  • Plastic scraper
  • Clean towels
  • Gloves and eye protection

The goal is to soften and lift the paint without scratching or gouging the vinyl.

3. Rinse the Area

Start by rinsing the affected section with a garden hose. This removes loose dirt and debris that could otherwise get caught underneath your cleaning tool and scratch the siding.

Work carefully around seams, trim, windows, and other exterior components.

4. Try Soap and Water First

Mix a small amount of mild household detergent with warm water. Apply the solution to the paint spot using a soft cloth or sponge.

Let the solution sit briefly, then gently rub the area.

For fresh water-based paint, this may be enough to remove the residue.

Avoid aggressively scrubbing. If the paint does not come off easily, move to a more targeted approach rather than simply applying more pressure.

5. Carefully Lift Dried Paint

If paint has dried on the siding, you may be able to loosen the edge and carefully lift it with a plastic scraper.

Hold the scraper at a shallow angle and work slowly.

Do not use:

  • Metal putty knives
  • Razor blades
  • Steel wool
  • Sandpaper
  • Wire brushes
  • Abrasive scouring pads

The objective is to remove the paint—not the finish of the vinyl siding.

EPA guidance for painted surfaces also cautions against excessive rubbing and abrasive cleaning methods, particularly where deteriorating paint may be involved.

How to Get Paint Off Vinyl Siding: A Safe Step-by-Step Guide

How to Get Paint Off Vinyl Siding When the Paint Is Stubborn

Sometimes a small paint spot is easy to remove, while another stain seems almost bonded to the siding. When that happens, patience is usually better than aggressive cleaning.

Test Any Cleaner Before Removing Paint From Vinyl Siding

If soap and water do not work, select a cleaner appropriate for the type of paint and follow its label directions.

Always test the product in an inconspicuous location before applying it to a visible portion of the siding.

Look for changes such as:

  • Discoloration
  • Loss of gloss
  • Softening
  • Warping
  • Surface damage

If the test area changes appearance, stop using the product.

The Vinyl Siding Institute notes that certain household cleaners can be used for stubborn stains, but it also emphasizes following precautionary labeling instructions and protecting landscaping from direct contact with cleaning agents.

What About Paint Thinner or Strong Solvents?

This is where homeowners should be especially cautious.

A product capable of dissolving paint may also affect vinyl siding. Strong solvents can create discoloration or damage that is more noticeable than the original paint stain.

For that reason, do not assume that paint thinner, acetone, or another powerful solvent is appropriate simply because it works on paint.

Read the product label carefully and follow the siding manufacturer’s recommendations whenever available.

The U.S. Environmental Protection Agency also advises homeowners to follow product labels and use appropriate precautions when handling paint strippers and related chemicals.

Can You Use a Pressure Washer to Remove Paint From Vinyl Siding?

A pressure washer can clean siding, but it is not automatically the best tool for paint removal from vinyl siding.

High-pressure water can force moisture behind siding or damage vulnerable areas when used incorrectly. It can also spread loosened paint and cleaning chemicals across windows, landscaping, walkways, and other surfaces.

If you decide to use pressure washing as part of exterior cleaning, use an appropriate pressure setting, keep the nozzle at a safe distance, and follow the siding manufacturer’s recommendations.

For a small paint splatter, hand cleaning is usually more controlled and allows you to target the affected area without unnecessarily blasting the surrounding siding.

What Not to Do When Removing Paint From Vinyl Siding

Knowing what to avoid is just as important as knowing how to get paint off vinyl siding.

Don’t Scrape Vinyl Siding With Metal Tools

Metal blades can scratch the siding’s surface. Even a small scratch can become more noticeable once the surrounding area is cleaned.

Use a plastic scraper when appropriate, and work slowly.

Don’t Use Abrasive Cleaning Tools

Steel wool, wire brushes, abrasive pads, and coarse sandpaper can alter the surface texture and appearance of vinyl siding.

Don’t Immediately Reach for Harsh Chemicals

More powerful does not necessarily mean better. A chemical strong enough to dissolve dried paint may also damage the vinyl.

Always start with the gentlest practical solution.

Don’t Ignore Paint That May Contain Lead

If the paint is old, particularly on an older home, homeowners should consider the possibility of lead-based paint.

EPA guidance notes that activities such as scraping, sanding, and using a heat gun can disturb painted surfaces and create paint chips or dust.

If you are working around older painted materials and suspect lead-based paint, stop before creating dust or chips and review EPA’s lead-safe renovation guidance.

When Paint Removal From Vinyl Siding Isn’t the Best Option

Sometimes the question is not how to get paint off vinyl siding, but whether the siding should be replaced instead.

Paint removal may not be worthwhile when:

  • Paint covers a large portion of the exterior
  • The siding is cracked or warped
  • The panels are badly faded
  • The siding has become brittle
  • Multiple panels are damaged
  • Cleaning has already changed the siding’s appearance
  • There is moisture damage behind or around the siding
  • The siding is nearing the end of its service life

How to Get Paint Off Vinyl Siding: A Safe Step-by-Step Guide

Paint Stains on Vinyl Siding vs. Damaged Siding

It is important to distinguish between a removable paint stain and damage to the siding itself.

A paint stain is typically a foreign material sitting on the siding’s surface. Damaged siding, on the other hand, may have:

  • Cracks
  • Holes
  • Warping
  • Fading
  • Brittleness
  • Loose panels
  • Water-related deterioration

If removing paint exposes an underlying problem, continuing to scrub may only make matters worse.

AAA Siding & Remodeling’s siding case study on wood rot demonstrates why exterior surface problems should not always be treated as cosmetic issues. In that project, deteriorated siding and underlying wood rot required replacement to prevent additional water and air penetration.

How to Prevent Paint From Getting on Vinyl Siding

The easiest way to deal with paint on siding is to prevent the splatter in the first place.

If you’re painting your home’s exterior, take time to protect the siding before opening the paint can.

Helpful precautions include:

  • Cover siding near the work area with appropriate protective materials.
  • Use drop cloths beneath the area being painted.
  • Mask trim and adjacent surfaces.
  • Avoid painting in excessively windy conditions.
  • Keep paint containers covered when they are not in use.
  • Clean spills and splatters promptly.
  • Follow the paint manufacturer’s application instructions.

Good preparation can save hours of cleanup later.

How to Get Paint Off Vinyl Siding: A Safe Step-by-Step Guide

How Vinyl Siding Maintenance Helps Protect Your Home’s Exterior

Regular vinyl siding maintenance makes it easier to spot paint splatters, dirt, mildew, discoloration, cracks, and other problems before they become more noticeable. Vinyl siding generally requires relatively little maintenance. 

When to Call a Professional for Paint Removal or Siding Replacement

A small paint splatter is often a manageable cleaning project. However, homeowners should know when to stop.

Consider professional help if the paint:

  • Covers multiple sections of siding
  • Has been present for a long time
  • Appears to be oil-based or difficult to identify
  • Requires strong chemicals to remove
  • Is located on older painted surfaces
  • Has already caused discoloration
  • Is hiding cracks or other siding damage
  • Is accompanied by moisture problems

Professional evaluation can help prevent a minor cosmetic issue from becoming an expensive exterior repair.

AAA Siding & Remodeling has more than 25 years of experience serving homeowners throughout the Kansas City metro and provides professional exterior remodeling services, including siding, replacement windows, and doors.

The company’s team also includes professionals with EPA RRP and lead-abatement credentials, which can be particularly relevant when exterior remodeling involves older painted surfaces.

Restore Your Home’s Exterior With AAA Siding & Remodeling

Knowing how to get paint off vinyl siding can help you tackle minor splatters without unnecessarily damaging your home’s exterior. Start with the gentlest method, test cleaning products before using them, avoid abrasive tools, and pay attention to signs that the siding itself may need repair or replacement.

If your vinyl siding is stained, damaged, faded, or simply ready for an exterior refresh, AAA Siding & Remodeling can help you determine the right solution. From vinyl siding installation and replacement to complete exterior remodeling, our team serves homeowners throughout the Kansas City metro with quality products and professional workmanship.

Contact AAA Siding & Remodeling today or call 816-421-5433 to schedule your consultation.

Frequently Asked Questions About How to Get Paint Off Vinyl Siding

What is the easiest way to get paint off vinyl siding?

Start with warm water, mild detergent, and a soft cloth or sponge. Fresh water-based paint is generally easier to remove than dried or oil-based paint. For dried spots, carefully test a plastic scraper or an appropriate cleaner in an inconspicuous area first.

Can you use vinegar to remove paint from vinyl siding?

Do not assume that vinegar or another household product is appropriate for every type of paint or vinyl siding. Test any cleaning solution in an inconspicuous area first and follow the siding and cleaner manufacturer’s instructions.

Will rubbing alcohol remove paint from vinyl siding?

It may affect some types of paint, but that does not mean it is safe for every vinyl siding finish. Always test a small hidden area first and stop if you notice discoloration or changes in the siding’s surface.

Can you use a pressure washer to remove paint from vinyl siding?

Pressure washing may help clean siding, but it should not be treated as a universal paint-removal solution. Excessive pressure or improper technique can damage siding or force water behind panels. For small paint spots, controlled hand cleaning is generally preferable.

What should I do if the paint will not come off?

Stop before resorting to increasingly aggressive chemicals or tools. If the paint covers a large area or the siding is already damaged, contact a professional siding contractor to determine whether cleaning, individual panel replacement, or full siding replacement makes the most sense.

Is vinyl siding supposed to be painted?

Vinyl siding is designed to be a low-maintenance exterior material and does not require routine painting. If you’re considering changing the color of existing vinyl siding, consult the siding manufacturer and a qualified professional before proceeding.

Related Topics
How to Hang Decorations on Vinyl Siding Without Causing Damage

How to Hang Decorations on Vinyl Siding: What Homeowners Should Know

Decorating your home for the holidays, changing seasons, or special occasions is a great way to add personality and curb appeal. But if your home has vinyl siding, you may wonder how to hang decorations on vinyl siding without drilling holes, cracking panels, or interfering with the siding’s ability to move. 

The good news is that you can hang many lightweight decorations safely when you use the right methods.

At AAA Siding & Remodeling, we understand that your siding is an important part of your home’s exterior protection and appearance. If your vinyl siding is damaged, aging, or no longer giving your home the look you want, our team can help. Contact AAA Siding & Remodeling or call 816-421-5433 to discuss your siding needs.

How to Hang Decorations on Vinyl Siding: Quick Overview

Before getting into the details, here are the key points to remember when hanging decorations on vinyl siding:

  • Use siding-specific hooks or clips whenever possible.
  • Choose lightweight decorations that do not put excessive strain on the siding.
  • Attach decorations to the siding seam rather than drilling directly through a panel.
  • Never force a hook between tightly interlocked panels.
  • Avoid nails, screws, and staples unless a professional determines that a permanent attachment is appropriate.
  • Keep decorations away from areas where water needs to drain.
  • Check the manufacturer’s recommendations for your specific siding.
  • Remove seasonal decorations carefully instead of pulling or twisting them.
  • Inspect the siding after removing decorations.

These simple precautions can help you enjoy seasonal decorating while reducing the risk of unnecessary siding damage.

Why You Should Be Careful When Hanging Decorations on Vinyl Siding

Vinyl siding is designed to protect your home while allowing for normal movement as outdoor temperatures change. Vinyl siding panels expand and contract with temperature fluctuations, which is why proper installation leaves room for movement.

That movement is one reason you should think twice before driving a nail or screw directly through a vinyl siding panel.

A hole can also create a potential entry point for moisture if it is not properly detailed. More importantly, fastening an object tightly against the siding can restrict the panel and potentially affect how it performs.

This does not mean you cannot decorate your home. It simply means you should choose a method that works with the siding rather than against it.

How to Hang Things on Vinyl Siding Without Drilling

The easiest solution for many homeowners is to use products specifically designed for vinyl siding.

Use Vinyl Siding Hooks

Vinyl siding hooks are designed to slip underneath the overlapping edge of a siding panel. They provide a small attachment point for lightweight decorations without requiring you to drill through the face of the siding.

These hooks are available in different styles and weight capacities, so always check the manufacturer’s instructions before using one.

A siding hook is particularly useful for:

  • Wreaths
  • Lightweight signs
  • Seasonal garlands
  • Small decorative baskets
  • Lightweight outdoor ornaments
  • Holiday decorations
  • Small flags

Some commercially available vinyl siding hooks are specifically designed to attach without drilling or permanently altering the siding.

Choose the Right Hook for the Decoration

Not every hook is appropriate for every decoration.

Before purchasing a vinyl siding hook, consider:

  1. Weight: Check the hook’s maximum weight rating.
  2. Size: Make sure the hook fits the profile of your siding.
  3. Location: Determine where the hook will sit and whether it will interfere with trim or other components.
  4. Weather: Outdoor decorations need to withstand wind, rain, temperature changes, and other conditions.
  5. Manufacturer instructions: Follow the instructions for both the hook and your siding.

When in doubt, use a lighter decoration or choose a different mounting location.

How to Hang Decorations on Vinyl Siding Without Causing Damage

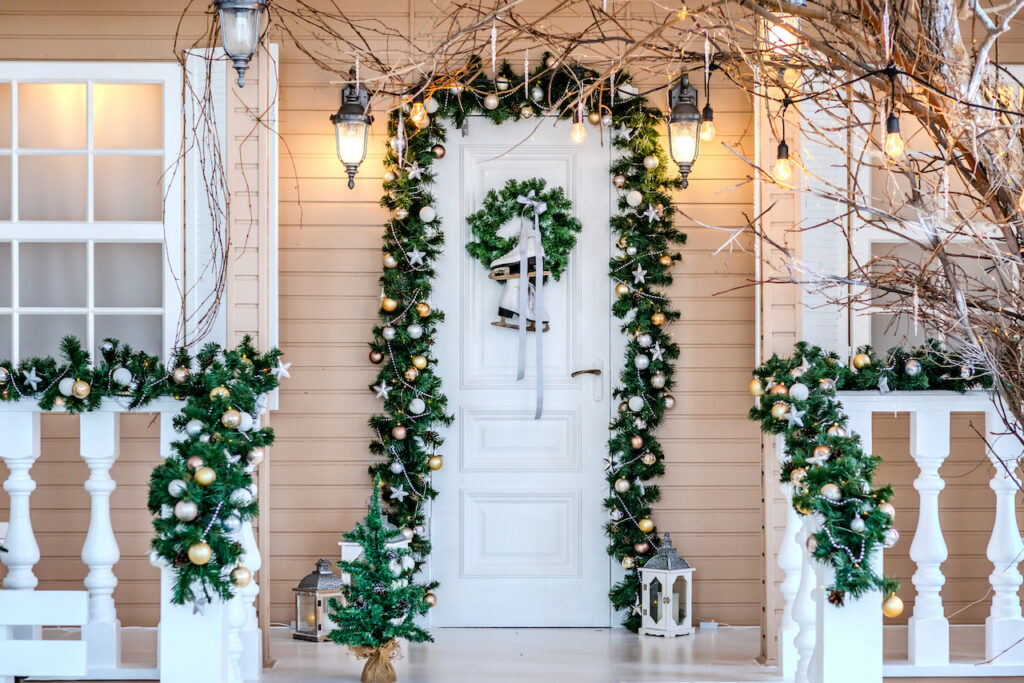
How to Hang Christmas Decorations on Vinyl Siding

Holiday decorating is one of the most common reasons homeowners search for ways to hang Christmas decorations on vinyl siding.

Fortunately, many popular Christmas decorations can be installed without drilling.

Hanging Wreaths on Vinyl Siding

Wreaths can often be attached using a siding hook or another exterior-rated hanging system.

Choose a location where the wreath will not interfere with:

  • Doors
  • Windows
  • Exterior lights
  • Gutters
  • Downspouts
  • Trim
  • Siding seams that are already damaged

A lightweight wreath is generally easier to support than a large, heavy wreath made with dense materials.

If your wreath is particularly heavy, windy conditions may create additional stress on the hook and siding. Consider placing heavier decorations on a porch, railing, or other structure designed to support them.

Hanging Garland on Vinyl Siding

Garland can be more challenging because it can cover a larger area and create additional wind resistance.

Instead of attaching numerous hooks directly across the siding, consider whether you can attach the garland to existing architectural features such as:

  • Porch railings
  • Columns
  • Fences
  • Porch ceilings
  • Door surrounds
  • Existing hooks designed for outdoor use

If you do use vinyl siding hooks, distribute the weight rather than placing the entire decoration on one attachment point.

Hanging Lights on Vinyl Siding

String lights are another popular seasonal decoration. Lightweight clips designed for outdoor use can be helpful, but homeowners should avoid creating unnecessary holes in siding.

Do not staple holiday lights directly into vinyl siding. Staples can puncture or damage the siding and may prevent the material from moving normally.

Instead, look for clips designed for the specific surface and lighting product you’re using.

How to Hang Outdoor Decorations on Vinyl Siding Safely

The safest method depends on the decoration, its weight, and where you want to place it.

Before hanging decorations on vinyl siding, inspect the area first.

Look for:

  • Cracked panels
  • Loose siding
  • Warping
  • Buckling
  • Fading
  • Existing holes
  • Moisture damage
  • Loose trim
  • Areas where siding has separated

Do not use a damaged section of siding as an attachment point.

If a panel is already loose or cracked, adding weight could make the problem worse. Instead, have the siding inspected and repaired before decorating.

How to Hang Decorations on Vinyl Siding Without Causing Damage

Where Should You Attach Vinyl Siding Hooks?

Placement matters.

A siding hook typically attaches underneath the upper edge of a siding panel. The hook should slide into place according to the product’s instructions rather than being forced into the seam.

Never pry the siding apart aggressively to make room for a hook.

Vinyl siding is installed as a system, with panels and accessories designed to work together. The siding needs room to move as temperatures change. CertainTeed specifically advises that vinyl siding and accessories must be able to move freely as they expand and contract.

If a hook does not fit easily, stop and try a different location or product.

Can You Drill Into Vinyl Siding to Hang Decorations?

Technically, objects can be attached through vinyl siding when the attachment is properly designed and secured to solid backing. However, this is generally not the first choice for temporary decorations.

Permanent exterior fixtures require more careful installation than a seasonal decoration.

CertainTeed recommends that exterior fixtures be attached to solid backing rather than relying on the vinyl siding itself. It also explains that when objects are attached through siding, the installation needs to accommodate the siding’s expansion and contraction.

That distinction is important.

Temporary Decorations vs. Permanent Fixtures

Temporary decorations:

  • Use removable siding hooks or clips.
  • Avoid drilling whenever possible.
  • Keep decorations lightweight.
  • Remove them carefully after the season.

Permanent fixtures:

  • Use proper structural attachment methods.
  • Secure the fixture to appropriate backing.
  • Account for siding movement.
  • Follow manufacturer instructions.
  • Consider professional installation.

A mailbox, light fixture, shutter, or other permanent exterior feature should not be treated the same way as a lightweight holiday decoration.

How to Hang Decorations on Vinyl Siding Without Causing Damage

What Not to Do When Hanging Decorations on Vinyl Siding

Knowing what to avoid is just as important as knowing how to hang things on vinyl siding.

Don’t Hammer Nails Directly Into the Siding

Driving a nail through the visible face of a vinyl siding panel can create a hole and potentially interfere with the siding’s movement.

If you need a permanent attachment, use a method designed for the siding system and the fixture being installed.

Don’t Use Staples for Holiday Decorations

Staples may seem convenient for attaching lights or garland, but they can puncture siding.

Choose outdoor-rated clips instead.

Don’t Hang Heavy Decorations From a Siding Panel

Vinyl siding is not intended to function as a structural support for heavy objects.

A large planter, oversized sign, heavy wreath, or other substantial decoration may require a different mounting solution.

Don’t Force Hooks Into the Siding

If a hook does not fit, do not bend, pry, or force the panel.

Forcing the siding can damage the interlocking edges or cause the panel to become loose.

Don’t Block Drainage Paths

Siding systems are designed to manage water. Decorations should not block drainage openings, trim channels, or other areas intended to allow moisture to escape.

How to Remove Decorations From Vinyl Siding

Taking decorations down requires just as much care as putting them up.

Start by removing the decoration’s weight from the hook. Then carefully remove the hook according to the manufacturer’s instructions.

Do not yank a hook downward or pull it sideways with excessive force.

After removing your decorations, inspect the siding for:

  • Cracks
  • Holes
  • Scratches
  • Loose panels
  • Discoloration
  • Warping
  • Damaged trim

If you notice a problem, address it before installing decorations again. Regular inspections are also a good part of general exterior care. 

When It’s Better to Replace or Repair Your Vinyl Siding

Sometimes the question isn’t really how to hang decorations on vinyl siding. The bigger question is whether the siding is still in good enough condition to decorate.

Consider having your siding professionally inspected if you notice:

  • Cracked or broken panels
  • Significant warping
  • Buckling
  • Loose sections
  • Persistent moisture problems
  • Rot or damage underneath the siding
  • Widespread fading
  • Repeated storm damage
  • Siding that no longer lays flat

One damaged panel does not necessarily mean your entire exterior needs replacement. However, widespread deterioration may indicate that replacement is a better long-term solution.

Decorating Your Home Without Compromising Its Exterior

The best way to approach decorations on vinyl siding is to think about the siding as part of a complete exterior system.

Your siding isn’t simply a decorative surface. It helps protect your home from outdoor conditions, and its installation allows for movement as temperatures change.

That is why a few minutes of planning before hanging decorations can make a big difference.

Choose lightweight decorations. Use the right hooks. Follow product instructions. Avoid drilling whenever possible. And inspect your siding before and after decorating.

If you are already noticing cracks, warping, moisture concerns, or other siding problems, decorations should take a back seat to addressing the underlying issue.

For homeowners planning broader exterior improvements, AAA Siding & Remodeling can also help coordinate siding, window, and door upgrades

Hang Decorations on Vinyl Siding the Right Way

Knowing how to hang decorations on vinyl siding can help you enjoy a beautifully decorated home without unnecessarily damaging your exterior. For most lightweight seasonal decorations, siding-specific hooks and clips are convenient alternatives to nails and screws. 

The key is to respect the way vinyl siding is designed to move, avoid overloading panels, and follow the manufacturer’s instructions for any mounting product you use.

If your siding is cracked, warped, loose, or showing signs of moisture damage, decorating may be a good opportunity to take a closer look at the condition of your home’s exterior. 

AAA Siding & Remodeling has served Kansas City-area homeowners since 1998 and specializes in siding, replacement windows, and exterior doors. Learn more about AAA Siding & Remodeling, explore the areas we serve, or schedule a free estimate online. You can also call 816-421-5433 to speak with the team about your siding project.


Frequently Asked Questions About Hanging Decorations on Vinyl Siding

What is the best way to hang decorations on vinyl siding?

The best method for lightweight, temporary decorations is generally a siding-specific hook or clip that attaches beneath the siding panel without drilling through the siding. Always check the product’s weight rating and installation instructions.

Can you put a hook in vinyl siding?

Yes, but use a hook specifically designed for vinyl siding. The hook should fit the siding profile and install without forcing or damaging the panel.

How do you hang things on vinyl siding without drilling?

Use vinyl siding hooks or clips designed to attach beneath the siding panel. These products can provide an attachment point without creating a hole in the visible face of the siding.

Can heavy decorations be hung on vinyl siding?

Heavy decorations should not be supported solely by vinyl siding. Permanent or heavy objects should be attached to solid structural backing using an appropriate installation method.

Will vinyl siding hooks damage siding?

When properly selected and installed according to the product instructions, siding hooks are designed to minimize damage. However, improperly installed hooks, excessive weight, or forcing a hook into the siding can cause problems.

Should you drill into vinyl siding?

For temporary decorations, drilling is generally unnecessary and should be avoided when possible. Permanent fixtures require a different installation approach that accounts for the siding’s movement and attaches to appropriate structural backing.

Helpful AAA Siding & Remodeling Resources


James Hardie Siding Colors: Find Your Perfect Match

When you’re choosing new siding, color is just as important as the material itself. The right shade can transform your home’s curb appeal, complement its architecture, and even increase its resale value. At AAA Siding & Remodeling, we’ve helped countless homeowners find the perfect exterior style, and one of the most common questions we hear is: Which James Hardie Statement Collection color is right for me?

If you’re exploring James Hardie siding colors, you’re already looking at one of the industry’s most trusted fiber cement siding products. The James Hardie Statement Collection offers professionally curated colors that are designed to stay beautiful for years thanks to ColorPlus® Technology. Instead of choosing from hundreds of overwhelming options, homeowners can confidently select from a collection of timeless colors that work with a variety of home styles.

In this guide, we’ll walk through every James Hardie Statement Collection color, explain what types of homes they work best with, and help you narrow down the perfect choice for your home.

Why Homeowners Love the James Hardie Statement Collection

The Statement Collection was created to simplify the color selection process while offering beautiful, lasting finishes. Every color in the collection is factory finished using James Hardie’s ColorPlus Technology, which is engineered to provide exceptional color consistency and durability.

Some of the biggest benefits include:

  • Professionally selected designer colors
  • Long-lasting baked-on finish
  • Excellent resistance to fading
  • Consistent color across every siding panel
  • A wide variety of classic and modern color options
  • Beautiful coordination with trim and architectural accents

Instead of worrying about repainting every few years, homeowners can enjoy an exterior designed to maintain its appearance through changing seasons.

White and Light Neutral James Hardie Siding Colors

If you want a timeless appearance that never goes out of style, lighter colors remain some of the most popular choices.

Discover the best James Hardie siding colors for your home. Compare every Statement Collection color and choose the perfect look with confidence.

Arctic White

Arctic White is one of the most recognizable James Hardie siding colors. Its crisp, clean appearance complements nearly every architectural style, from traditional farmhouses to modern homes.

This color works especially well with:

  • Black window frames
  • Dark roofs
  • Stone accents
  • Bold front doors

Because white reflects sunlight, it can also help create a brighter appearance for the exterior.

Cobble Stone

Cobble Stone is a warm light gray that offers more depth than white while still maintaining a clean appearance. It’s ideal for homeowners wanting a subtle neutral that pairs well with natural landscaping.

Navajo Beige

Navajo Beige delivers soft warmth without appearing overly yellow. This versatile neutral fits beautifully on traditional homes and blends well with brick or stone.

Light Mist

Light Mist offers a soft gray appearance with cool undertones. It’s an excellent choice for homeowners who want something modern without going too dark.

Pearl Gray

Pearl Gray creates a sophisticated look that’s elegant yet understated. It works particularly well with white trim and darker roofing materials.

Warm Earth Tone James Hardie Siding Colors

Earth tones continue to be popular because they blend naturally into surrounding landscapes while creating a welcoming appearance.

Discover the best James Hardie siding colors for your home. Compare every Statement Collection color and choose the perfect look with confidence.

Khaki Brown

Khaki Brown provides rich warmth without becoming overwhelming. It complements wooded lots and homes with natural stone.

Monterey Taupe

Monterey Taupe strikes a perfect balance between gray and brown. This flexible neutral works well with numerous architectural styles and offers a refined appearance.

Timber Bark

Timber Bark is a deeper brown that gives homes a cozy, rustic character. It’s an excellent choice for craftsman homes, cabins, and homes surrounded by mature trees.

Rich Espresso

Rich Espresso is the darkest brown in the Statement Collection. This bold color creates dramatic curb appeal while highlighting white trim and natural wood accents.

Green James Hardie Siding Colors

Green siding has seen a resurgence as homeowners embrace colors inspired by nature.

Mountain Sage

Mountain Sage is a calming green that blends beautifully into wooded settings while remaining elegant enough for suburban neighborhoods.

It pairs well with:

  • Cream trim
  • Natural cedar accents
  • Stone veneer
  • Black shutters

Mountain Sage offers personality without feeling trendy.

Blue James Hardie Siding Colors

Blue continues to be one of the fastest-growing exterior color families because it feels both timeless and fresh.

Discover the best James Hardie siding colors for your home. Compare every Statement Collection color and choose the perfect look with confidence.

Boothbay Blue

Boothbay Blue is a soft blue-gray that creates a coastal-inspired appearance while remaining sophisticated enough for inland homes.

It’s an excellent choice for:

  • Colonial homes
  • Craftsman homes
  • Cape Cod styles
  • Traditional neighborhoods

Evening Blue

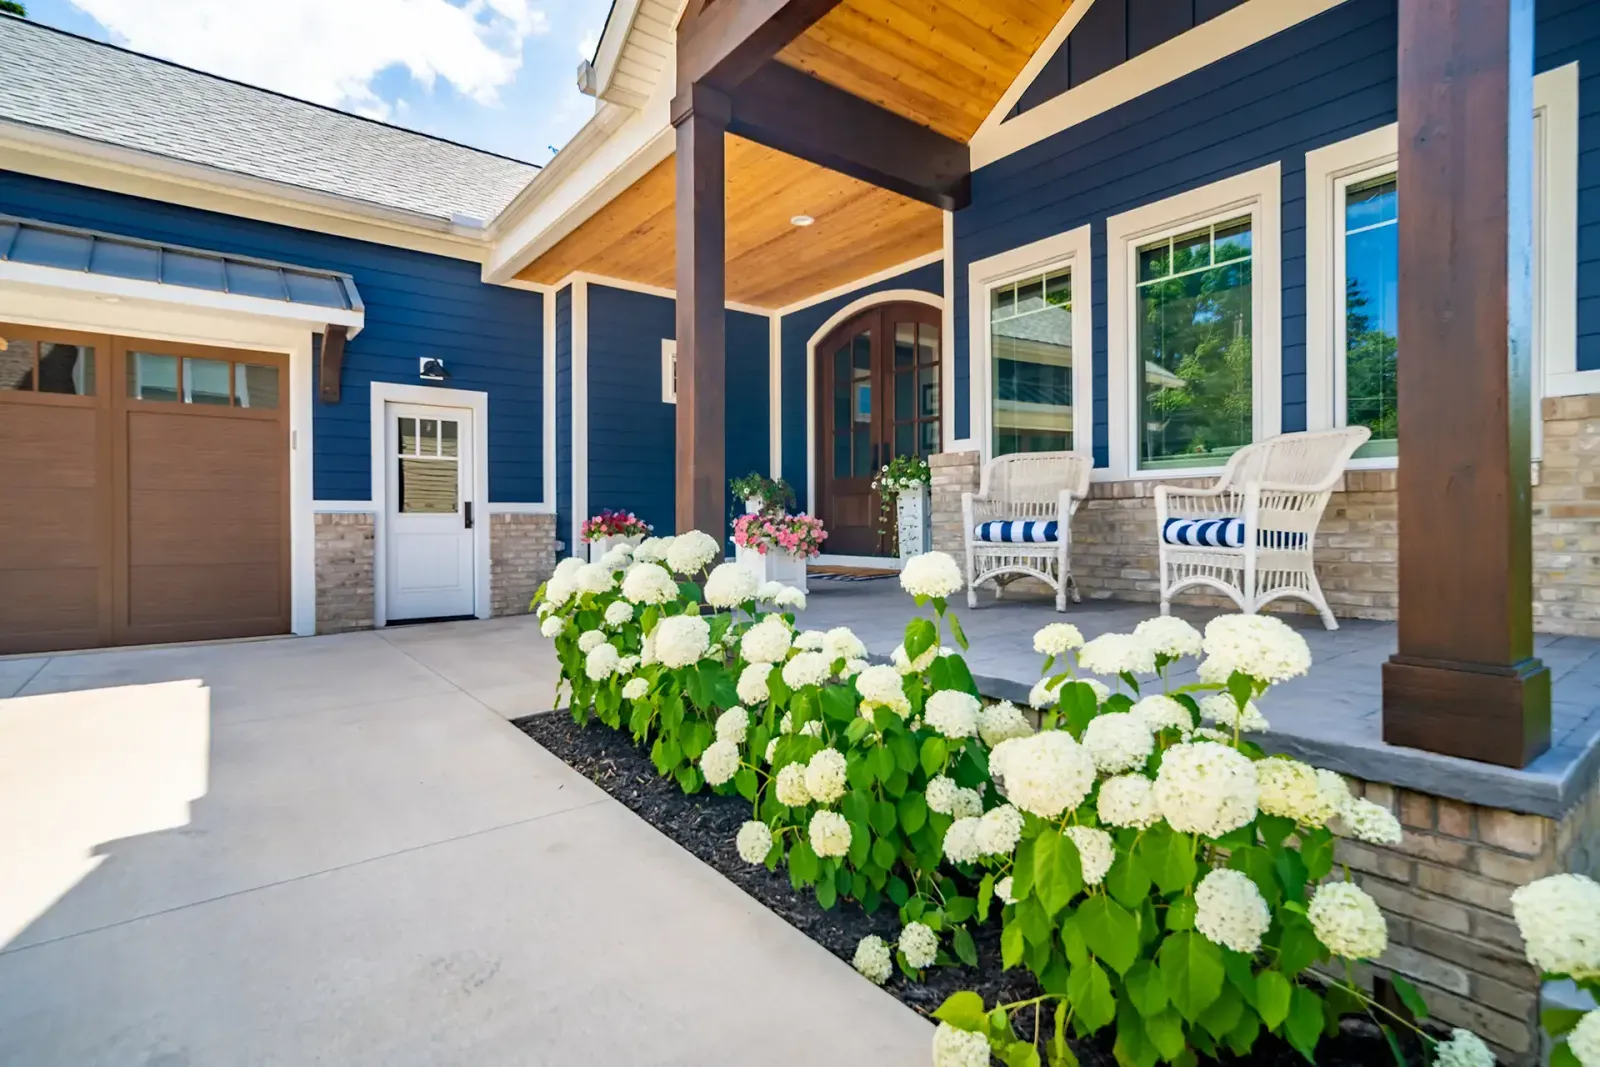
Evening Blue offers a richer navy appearance without becoming too dark. It creates beautiful contrast with white trim.

Deep Ocean

Deep Ocean is one of the boldest James Hardie siding colors. This deep blue has gray undertones that create an upscale, dramatic exterior.

Homeowners looking for a statement often gravitate toward Deep Ocean because it provides depth while remaining timeless.

Gray James Hardie Siding Colors

Gray remains one of today’s most requested siding color families because it works with nearly every home style.

Discover the best James Hardie siding colors for your home. Compare every Statement Collection color and choose the perfect look with confidence.

Gray Slate

Gray Slate is a balanced medium gray that fits both modern and traditional homes.

Aged Pewter

Aged Pewter combines warm and cool undertones, making it one of the most versatile colors in the Statement Collection.

This color pairs beautifully with:

  • White trim
  • Black windows
  • Stone accents
  • Brick foundations

Night Gray

Night Gray is a darker gray that creates strong curb appeal while remaining softer than black.

Iron Gray

Iron Gray delivers a bold charcoal appearance that complements modern architecture exceptionally well.

It has become one of the most popular James Hardie siding colors because it feels contemporary without being overly trendy.

Bold Statement Colors

If you’re looking to stand out while maintaining timeless appeal, these colors offer exceptional character.

Countrylane Red

Countrylane Red delivers classic Americana charm. It’s frequently selected for farmhouses, cottages, and historic-inspired homes.

It pairs especially well with:

  • White trim
  • Black shutters
  • Natural wood porches
  • Stone foundations

Midnight Black

Midnight Black creates one of the most dramatic exterior designs available. Despite its bold appearance, black siding has become increasingly popular in modern architecture.

When combined with wood accents and large windows, Midnight Black creates a sleek, high-end look.

How to Choose the Right James Hardie Siding Color

With so many excellent options, narrowing your decision can feel overwhelming. Fortunately, a few considerations can make the process much easier.

Consider Your Home’s Style

Different architectural styles naturally complement certain colors.

For example:

  • Farmhouses often look beautiful in Arctic White or Countrylane Red.
  • Craftsman homes pair well with Mountain Sage or Timber Bark.
  • Modern homes frequently feature Iron Gray or Midnight Black.
  • Coastal-inspired homes often shine with Boothbay Blue.

Think About Your Neighborhood

You want your home to feel unique while still fitting comfortably within the surrounding community.

Choosing a timeless neutral often provides the best long-term value while still allowing your home to stand out through trim, doors, landscaping, and lighting.

Coordinate Existing Features

Unless you’re replacing everything at once, your siding should coordinate with your home’s:

  • Roof
  • Brick
  • Stone
  • Windows
  • Garage doors
  • Gutters

These permanent features should influence your siding color selection.

Consider Maintenance

Lighter colors may hide dust and pollen differently than darker colors, while darker shades often create stronger visual contrast with landscaping.

Fortunately, James Hardie’s ColorPlus Technology is designed to provide long-lasting beauty regardless of which color you choose.

Don’t Forget About Trim Colors

Your siding color is only part of the overall design.

The right trim can dramatically change your home’s appearance by adding contrast or creating a softer, more unified exterior.

Discover the best James Hardie siding colors for your home. Compare every Statement Collection color and choose the perfect look with confidence.

Many homeowners pair:

  • Arctic White siding with black trim for a modern appearance.
  • Boothbay Blue with crisp white trim.
  • Iron Gray with bright white trim.
  • Mountain Sage with cream accents.
  • Midnight Black with natural wood features.

Taking the time to coordinate trim colors can elevate the entire project.

Why Professional Installation Matters

Even the most beautiful James Hardie siding colors won’t perform as intended without proper installation.

James Hardie products require precise installation techniques to maximize durability, weather resistance, and long-term performance. Choosing an experienced contractor helps ensure your investment looks beautiful for years to come.

At AAA Siding & Remodeling, we help homeowners select the ideal James Hardie Statement Collection color while providing expert installation that protects their investment.

If you’re updating more than just your siding, we also install vinyl siding, engineered wood siding, replacement windows, and exterior doors, making it easy to complete your entire exterior renovation with one experienced team.

Whether you need a siding repair after storm damage or a complete siding replacement, our team is here to help you choose the right solution for your home and budget.

Find the Perfect James Hardie Siding Color with AAA Siding & Remodeling

Choosing between the available James Hardie siding colors doesn’t have to be overwhelming. Whether you’re drawn to the timeless simplicity of Arctic White, the natural warmth of Mountain Sage, the bold elegance of Iron Gray, or the dramatic look of Midnight Black, the James Hardie Statement Collection offers a carefully curated palette designed to complement virtually every home style.

At AAA Siding & Remodeling, we’re committed to helping homeowners make confident decisions that improve curb appeal, protect their investment, and create a home they’ll love for years to come. From helping you compare colors to providing expert installation, our experienced team is here every step of the way.

Ready to transform your home’s exterior? Contact AAA Siding & Remodeling by calling 816-421-5433 or reach out online today to schedule your consultation and let us help you find the perfect James Hardie Statement Collection color for your home.

Frequently Asked Questions

1. What are the most popular James Hardie siding colors?

Some of the most popular James Hardie Statement Collection colors include Arctic White, Boothbay Blue, Aged Pewter, Iron Gray, and Midnight Black because they offer timeless curb appeal across many home styles.

2. Does James Hardie siding fade over time?

James Hardie Statement Collection products feature ColorPlus Technology, a factory-applied finish engineered to provide long-lasting color and improved resistance to fading compared to traditional field-painted siding.

3. Can I mix multiple James Hardie siding colors?

Yes. Many homeowners use one color for the main siding and a complementary color for accents such as gables or architectural features to create additional visual interest.

4. Which James Hardie siding color is best for resale value?

Classic neutrals like Arctic White, Aged Pewter, Pearl Gray, and Cobble Stone tend to have broad buyer appeal, making them excellent choices for long-term resale value.

5. How do I choose the right James Hardie siding color for my home?

Consider your home’s architecture, roof color, stone or brick accents, neighborhood style, and personal preferences. Working with an experienced contractor like AAA Siding & Remodeling can also help you confidently select the best color for your home’s exterior.

Related Topics
Engineered Wood Siding vs Fiber Cement: Which Is Better?

When you’re investing in new siding, one of the biggest decisions you’ll make is choosing the right material. Two of today’s most popular options are engineered wood siding and fiber cement siding. Each offers impressive durability, attractive curb appeal, and long-term value, but they differ in maintenance, performance, appearance, and installation.

At AAA Siding & Remodeling, we help homeowners choose siding that fits their home’s style, budget, and long-term goals. Whether you’re replacing aging siding or building a new home, understanding the differences between these materials can help you make a confident decision.

This guide compares engineered wood siding vs fiber cement so you can determine which option is right for your home.

What Is Engineered Wood Siding?

Engineered wood siding is a manufactured product made by combining wood fibers or wood strands with resins and waxes under high pressure. The result is a durable siding material designed to provide the appearance of natural wood while improving resistance to moisture, insects, and decay.

Unlike traditional wood siding, engineered wood is treated during manufacturing to help it withstand harsh weather and everyday wear.

Many homeowners choose engineered wood because it delivers the warmth and character of real wood without requiring as much maintenance.

Compare engineered wood siding vs fiber cement to find the best option for your home. Learn the pros, cons, costs, and durability.

What Is Fiber Cement Siding?

Fiber cement siding is manufactured using a blend of cement, sand, cellulose fibers, and water. This combination creates an extremely durable material that stands up well to changing weather conditions, pests, and fire.

At AAA Siding & Remodeling, we proudly install James Hardie® fiber cement siding, one of the most trusted names in the industry. James Hardie products are engineered for long-lasting performance and are specifically designed to resist many of the issues that affect other siding materials.

Fiber cement has become one of the most popular premium siding choices because it combines exceptional durability with beautiful curb appeal.

Engineered Wood Siding vs Fiber Cement at a Glance


Feature
Engineered Wood
Fiber Cement
Appearance
Natural wood look
Wood grain
Durability
Excellent
Outstanding
Moisture Resistance
Very Good
Excellent
Pest Resistance
Treated against termites
Naturally resistant
Fire Resistance
Moderate
Noncombustible
Weight
Lightweight
Heavier
Installation
Easier and faster
More labor intensive
Maintenance
Periodic repainting
Lower maintenance
Longevity
Long lasting
Exceptional lifespan


Appearance and Design Options

One of the biggest reasons homeowners compare engineered wood siding vs fiber cement is aesthetics.

Both materials are designed to resemble natural wood and can dramatically improve curb appeal.

Engineered Wood

Engineered wood offers:

  • Deep wood grain textures
  • Rustic appearance
  • Traditional lap siding
  • Panel siding
  • Shake-style accents
  • Multiple paint colors

Many homeowners appreciate how authentic engineered wood looks from the street.

Fiber Cement

James Hardie fiber cement siding is available in numerous styles, including:

  • Traditional lap siding
  • Vertical siding
  • Shingle siding
  • Board and batten
  • Smooth finishes
  • Cedar mill textures

Compare engineered wood siding vs fiber cement to find the best option for your home. Learn the pros, cons, costs, and durability.

It also comes in a wide variety of factory-finished colors that are designed for long-lasting beauty.

Winner: Tie. Both products provide beautiful styles that can complement nearly any home.

Durability

Durability is where both siding materials truly shine, although they excel in slightly different ways.

Engineered wood is manufactured to resist many of the problems associated with traditional wood siding. Protective resins and treatments help defend against moisture, fungal decay, and insect damage.

Fiber cement takes durability even further. Because it contains cement rather than wood, it resists many environmental threats that can shorten the life of other siding materials.

James Hardie siding is engineered to handle changing climates while maintaining its strength and appearance for many years.

If long-term toughness is your highest priority, fiber cement often comes out ahead.

Winner: Fiber cement.

Moisture Resistance

Water is one of the biggest threats to any home’s exterior.

Properly installed engineered wood performs well against moisture because of the waxes and resins used during manufacturing. However, like any siding material, poor installation or damaged paint can eventually allow moisture intrusion.

Fiber cement naturally resists moisture damage when installed correctly. It will not rot like traditional wood and is less susceptible to swelling from humidity.

For homeowners in climates with frequent rain, snow, or seasonal humidity, fiber cement provides added peace of mind.

Winner: Fiber cement.

Resistance to Pests

Termites and wood-boring insects can cause serious damage to some siding materials.

Engineered wood is specially treated to resist termites and fungal growth, making it much more durable than natural wood siding.

Fiber cement contains no wood products that insects can consume, making it naturally resistant to termite damage.

Both perform well, but fiber cement offers an additional layer of protection simply because it is not made from wood.

Winner: Fiber cement.

Fire Resistance

Fire resistance is another important difference in the engineered wood siding vs fiber cement comparison.

Fiber cement is a noncombustible material. It will not ignite when exposed to direct flame, making it an excellent option for homeowners looking to improve their home’s fire resistance.

Engineered wood receives protective treatments during manufacturing but still contains wood fibers. While these treatments improve performance, it is not considered noncombustible like fiber cement.

If fire resistance is one of your top priorities, fiber cement is the stronger choice.

Winner: Fiber cement.

Installation Differences

Installation affects both project timelines and overall performance.

Engineered wood siding is significantly lighter than fiber cement, making it easier to transport, cut, and install. Contractors can often complete projects more quickly because the material is easier to handle.

Fiber cement is much heavier and requires specialized cutting tools, proper safety equipment, and experienced installers.

Although installation may take longer, many homeowners feel the added durability is worth the investment.

Professional installation is essential regardless of which material you choose to ensure maximum performance and warranty protection.

Winner: Engineered wood.

Maintenance Requirements

Every siding material requires some routine maintenance to continue looking its best.

Engineered Wood

Maintenance generally includes:

  • Washing away dirt and debris
  • Inspecting for damaged caulk
  • Touching up paint when necessary
  • Keeping vegetation trimmed away

Fiber Cement

Fiber cement typically requires:

  • Occasional cleaning
  • Periodic inspections
  • Repainting after many years if desired
  • Checking sealants around windows and trim

Both products are relatively low maintenance compared to traditional wood siding, but fiber cement generally requires less attention over its lifespan.

Winner: Fiber cement.

Longevity

When investing in new siding, homeowners want confidence that their investment will last.

Both engineered wood and fiber cement offer excellent longevity when professionally installed and properly maintained.

Engineered wood provides decades of reliable performance while maintaining its attractive appearance.

James Hardie fiber cement siding is widely recognized for its exceptional long-term durability, often making it a preferred option for homeowners planning to stay in their homes for many years.

Winner: Fiber cement.

Compare engineered wood siding vs fiber cement to find the best option for your home. Learn the pros, cons, costs, and durability.

Cost Considerations

Cost is often one of the first questions homeowners ask.

Engineered wood is generally less expensive to install because:

  • The material weighs less
  • Installation is faster
  • Labor costs are often lower

Fiber cement typically requires:

  • More labor
  • Specialized installation techniques
  • Additional cutting equipment
  • Longer installation time

While the initial investment may be higher, many homeowners find fiber cement’s durability and lower maintenance needs provide excellent long-term value.

Instead of focusing only on upfront cost, it’s helpful to consider lifetime ownership costs when comparing siding options.

Winner: Engineered wood for initial affordability. Fiber cement for long-term value.

Which Material Looks More Like Real Wood?

This question often surprises homeowners.

Engineered wood is made with actual wood fibers, allowing manufacturers to create highly realistic grain patterns.

James Hardie fiber cement products also feature convincing wood grain textures that closely resemble cedar and other natural wood species.

From the curb, many homeowners and even professionals have difficulty distinguishing either product from real wood.

Ultimately, appearance often comes down to personal preference and the specific profile you select.

Which Is Better for Your Home?

The answer depends on your priorities.

Choose engineered wood siding if you want:

  • Lower installation costs
  • Lighter materials
  • A realistic wood appearance
  • Faster installation

Compare engineered wood siding vs fiber cement to find the best option for your home. Learn the pros, cons, costs, and durability.

Choose fiber cement siding if you want:

  • Maximum durability
  • Outstanding moisture resistance
  • Superior fire resistance
  • Minimal maintenance
  • Exceptional long-term value

Many homeowners who prioritize durability and longevity ultimately choose James Hardie fiber cement siding because of its proven performance in a variety of climates.

Don’t Forget About the Rest of Your Exterior

While siding makes the biggest visual impact, it works best as part of a complete exterior renovation. In addition to fiber cement and engineered wood siding, AAA Siding & Remodeling also installs high-quality vinyl siding, replacement windows, and exterior doors to help improve your home’s appearance, comfort, and energy efficiency.

Whether you need a small repair after storm damage or it’s time for a complete exterior makeover, AAA Siding & Remodeling can handle both your siding repair and full siding replacement with expert craftsmanship and quality materials.

Final Thoughts

When comparing engineered wood siding vs fiber cement, there is no universal winner because every homeowner has different priorities.

Engineered wood offers beautiful natural aesthetics, lighter weight, and lower installation costs, making it an attractive option for many homes.

Fiber cement, especially James Hardie siding, stands out for its remarkable durability, moisture resistance, fire resistance, and long-term performance. Although the upfront investment is often higher, many homeowners find the added protection and reduced maintenance make it well worth the cost.

At AAA Siding & Remodeling, we’re here to help you compare your options, answer your questions, and recommend the best siding solution for your home’s needs and your budget.

Ready to Upgrade Your Home?

Whether you’re interested in engineered wood siding or premium James Hardie fiber cement siding, the experienced team at AAA Siding & Remodeling is ready to help. Contact us today by calling 816-421-5433 or reach out online to schedule a consultation and discover which siding option is the perfect fit for your home.

Frequently Asked Questions

1. Is engineered wood siding cheaper than fiber cement?

Generally, yes. Engineered wood typically has lower material and installation costs because it is lighter and easier to install.

2. Does James Hardie siding require a lot of maintenance?

No. James Hardie fiber cement siding requires occasional cleaning and periodic inspections but generally needs less maintenance than many other siding materials.

3. Which siding lasts longer?

Both materials are durable, but fiber cement is generally known for its exceptional longevity when professionally installed and properly maintained.

4. Which siding is better for wet climates?

Fiber cement typically performs better in areas with frequent rain or humidity because of its excellent moisture resistance.

5. Can AAA Siding & Remodeling help me choose the right siding?

Absolutely. Our team can evaluate your home, discuss your goals, explain your options, and recommend the siding material that best fits your needs and budget.

Related Topics
How to Clean Siding for Every Material

Your home’s siding is one of the first things people notice. Clean, well maintained siding improves curb appeal, protects your home from the elements, and can even help extend the life of your exterior. Over time, though, dirt, pollen, mildew, algae, and other contaminants naturally build up on siding, leaving it looking dull or stained.

At AAA Siding & Remodeling, we know homeowners in the Kansas City metro area often wonder how to clean siding without causing damage. The good news is that most siding materials are relatively easy to maintain when cleaned correctly. The key is understanding that each material has different care requirements. Using the wrong tools or cleaning methods can scratch finishes, force water behind panels, or shorten the lifespan of your siding.

This guide explains how to clean the most common siding materials, what cleaning products to use, what to avoid, and how often you should clean your home’s exterior.

Why Cleaning Your Siding Matters

Siding does much more than improve your home’s appearance. It acts as a protective barrier against moisture, wind, and changing weather conditions.

Regular cleaning helps:

  • Remove dirt and airborne pollutants
  • Prevent algae, mold, and mildew buildup
  • Preserve the original color and finish
  • Make routine inspections easier
  • Extend the life of your siding
  • Improve curb appeal

Many homeowners only think about cleaning their siding when stains become obvious. Instead, routine maintenance can prevent stubborn buildup before it becomes difficult to remove.

Before You Start Cleaning

Regardless of what type of siding you have, a little preparation goes a long way.

Before washing your home:

  • Walk around the house and inspect the siding for cracks, loose panels, or damaged caulk.
  • Close all windows and doors securely.
  • Cover outdoor electrical outlets if necessary.
  • Protect delicate landscaping.
  • Test any cleaning solution in a small, hidden area first.
  • Work on a cool, cloudy day whenever possible to prevent cleaners from drying too quickly.

Taking a few extra minutes to prepare helps prevent accidental damage while producing better cleaning results.

General Rules for Cleaning Any Type of Siding

While every siding material has its own recommendations, several best practices apply across the board.

Always:

  • Start cleaning from the bottom and work your way upward when applying a cleaning solution.
  • Rinse thoroughly from the top down.
  • Use a soft cloth, soft brush, or soft bristle brush instead of abrasive scrubbers.
  • Follow the manufacturer’s cleaning recommendations.
  • Rinse away all cleaning residue completely.

Avoid:

  • Wire brushes
  • Steel wool
  • Harsh abrasive cleaners
  • Undiluted bleach
  • Solvent based cleaners unless specifically recommended
  • Letting cleaning solutions dry on the siding

Following these general guidelines reduces the risk of discoloration, scratches, or permanent damage.

How to Clean Vinyl Siding

Vinyl siding is one of the easiest siding materials to maintain. Dirt usually sits on the surface rather than penetrating the material, making regular cleaning fairly simple.

How to Clean Siding for Every Material

Supplies You’ll Need

  • Garden hose
  • Soft bristle brush or soft cloth
  • Mild soap or siding cleaner
  • Bucket of water

Cleaning Steps

Begin by rinsing the siding with a garden hose to loosen dirt and debris.

Next, mix a mild cleaning solution according to the manufacturer’s instructions. Using a soft brush or cloth, gently scrub the siding in manageable sections.

Pay extra attention to areas under roof overhangs, near landscaping, or on shaded sides of the home where algae and mildew tend to develop.

Once each section is cleaned, rinse thoroughly before moving to the next area.

Can You Pressure Wash Vinyl Siding?

Pressure washing may be appropriate in some situations, but it must be done carefully.

High pressure can:

  • Force water behind siding panels
  • Damage seams
  • Loosen panels
  • Increase the risk of moisture problems inside walls

If using a pressure washer, always follow the siding manufacturer’s recommendations and use the lowest effective pressure while spraying downward rather than upward beneath the panels.

For many homeowners, a standard garden hose and soft brush are more than sufficient.

How to Clean Fiber Cement Siding

Fiber cement siding, such as James Hardie, is known for its durability and low maintenance, but it still benefits from occasional cleaning.

Dust, dirt, mildew, and airborne contaminants can collect on the surface over time, especially in humid climates.

How to Clean Siding for Every Material

Best Cleaning Method

Use:

  • Garden hose
  • Soft brush
  • Mild detergent
  • Clean water

Rinse the siding first to remove loose dirt.

Using a soft brush, gently scrub the surface with mild soapy water. Avoid aggressive scrubbing that could damage the painted finish.

Once cleaned, thoroughly rinse away all soap residue.

Pressure Washing Fiber Cement

Some manufacturers allow pressure washing under specific conditions, while others recommend avoiding excessive pressure.

If pressure washing is used:

  • Follow manufacturer guidelines
  • Keep pressure moderate
  • Never spray upward beneath lap boards
  • Maintain a safe distance from the siding

When in doubt, hand washing remains the safest approach.

How to Clean Wood Siding

Wood siding requires a little more care than synthetic materials because excessive moisture and harsh cleaning methods can damage natural wood fibers.

Regular cleaning helps preserve both painted and stained finishes.

How to Clean Siding for Every Material

Cleaning Process

First, remove loose dirt with a gentle rinse from a garden hose.

Mix a mild cleaning solution and carefully scrub the siding using a soft brush.

Work with the grain of the wood whenever possible.

After cleaning, rinse thoroughly to remove any remaining cleaner.

Allow the siding to dry completely.

Extra Care Tips

Wood siding should never be cleaned with:

  • Wire brushes
  • Abrasive pads
  • Harsh chemicals
  • Excessively high water pressure

If paint is peeling or wood appears damaged, repairs should be completed before cleaning the entire exterior.

How to Clean Composite Siding

Composite siding combines durability with relatively easy maintenance.

Like other siding materials, it benefits from occasional washing to remove dirt, pollen, mold, and mildew.

Recommended Cleaning

Most composite siding can be cleaned using:

  • Mild soap
  • Water
  • Soft brush
  • Garden hose

Clean small sections at a time, gently scrubbing stubborn spots before rinsing completely.

Always check the manufacturer’s care recommendations since cleaning requirements may vary slightly between products.

Removing Mold, Mildew, and Algae

Dark streaks or green patches often indicate algae or mildew growth rather than ordinary dirt.

These organisms commonly appear on:

  • North facing walls
  • Areas beneath trees
  • Shaded sections of the home
  • Locations with poor airflow

Many siding manufacturers recommend cleaning solutions designed specifically for mildew removal.

Regardless of the cleaner used, rinse thoroughly afterward and avoid allowing chemicals to dry on the siding surface.

Also remember that cleaning removes existing growth but may not eliminate the conditions that allow it to return. Improving sunlight exposure by trimming vegetation and increasing airflow around the home can help reduce future growth.

How Often Should You Clean Siding?

Most homes benefit from cleaning about once each year.

However, you may need more frequent cleaning if your home:

  • Sits beneath large trees
  • Is located near busy roads
  • Experiences heavy pollen seasons
  • Has significant shade
  • Is in a humid climate where algae and mildew grow more quickly

Routine inspections throughout the year can help you determine when another cleaning is needed.

How to Clean Siding for Every Material

Common Mistakes to Avoid

Cleaning siding seems straightforward, but several common mistakes can cause expensive damage.

Using Too Much Pressure

One of the biggest mistakes homeowners make is assuming more pressure equals better cleaning.

Excessive pressure can:

  • Crack siding
  • Remove protective finishes
  • Force water behind siding
  • Loosen trim pieces

Gentle cleaning is almost always the safer choice.

Using Abrasive Tools

Scouring pads, wire brushes, and steel wool may remove stains, but they can also scratch finishes permanently.

Soft brushes provide effective cleaning without damaging the surface.

Ignoring Manufacturer Guidelines

Every siding product has specific maintenance recommendations.

Following those guidelines helps preserve warranties while reducing the risk of accidental damage.

Letting Cleaners Dry

Cleaning products should never dry on the siding.

Work in smaller sections so you can rinse completely before moving on.

Skipping Routine Maintenance

Waiting years between cleanings often allows dirt and mildew to become much harder to remove.

Annual maintenance is usually much easier than trying to restore heavily stained siding.

When Cleaning Is Not Enough

Sometimes dirty siding is actually damaged siding.

If you notice:

  • Cracks
  • Warping
  • Loose panels
  • Fading that does not improve after cleaning
  • Rot on wood siding
  • Water damage

It may be time for repairs or replacement rather than another cleaning.

A professional inspection can help determine whether simple maintenance is enough or if more extensive work is needed.

Keep Your Home Looking Its Best

Learning how to clean siding properly helps protect your investment while keeping your home looking beautiful year after year.

Whether your home features vinyl, fiber cement, wood, or composite siding, using the right cleaning methods can remove dirt, algae, and mildew without causing unnecessary damage. Gentle cleaning, regular inspections, and following manufacturer recommendations all play an important role in extending the life of your home’s exterior.

At AAA Siding & Remodeling, we’re committed to helping homeowners protect and improve their homes. If your siding no longer looks its best after cleaning, or if you’ve noticed damage that needs professional attention, our experienced team is here to help. Contact AAA Siding & Remodeling by calling 816-421-5433 or reach out online today for a free consultation and discover the best solutions to keep your home’s exterior looking beautiful for years to come.

Frequently Asked Questions

1. How often should I clean my siding?

Most homes should have their siding cleaned about once a year. Homes surrounded by trees, located in humid climates, or exposed to heavy pollen may benefit from more frequent cleaning.

2. Is it safe to pressure wash siding?

It depends on the siding material and the manufacturer’s recommendations. Pressure washing with excessive force can damage siding or force water behind panels. In many cases, a garden hose and soft brush are the safer option.

3. What is the best cleaner for siding?

A mild soap solution or a manufacturer approved siding cleaner is generally recommended. Avoid abrasive cleaners and harsh chemicals that could damage the finish.

4. Can I remove mold and mildew from siding?

Yes. Mold and mildew can often be removed using cleaning solutions designed for exterior siding. Follow the product directions carefully and rinse thoroughly after cleaning.

5. What should I do if my siding still looks bad after cleaning?

If stains remain after proper cleaning, the siding may be faded, damaged, or reaching the end of its lifespan. A professional inspection can determine whether repairs or replacement are the best solution.

Related Topics
Is Engineered Wood Siding Right for Your Home?

Is Engineered Wood Siding Right for Your Home?

When it comes to upgrading your home’s exterior, selecting the right siding material is one of the most important decisions you’ll make. Your siding affects curb appeal, energy efficiency, maintenance requirements, and long-term protection against the elements. While vinyl and fiber cement remain popular choices, engineered wood siding has become one of the fastest-growing options for homeowners seeking the beauty of natural wood without many of the drawbacks associated with traditional wood siding.

At AAA Siding & Remodeling, we help Kansas City metro area homeowners choose siding solutions that deliver lasting performance, value, and style. One material that consistently stands out is engineered wood siding. Combining advanced manufacturing technology with the timeless appearance of real wood, it offers an impressive balance of aesthetics, durability, and affordability.

If you’re considering a siding replacement, understanding the benefits of engineered wood siding can help you determine whether it’s the right fit for your home.

What Is Engineered Wood Siding?

Engineered wood siding is a manufactured siding product made from wood fibers, wood strands, resins, waxes, and protective additives that are compressed under heat and pressure. The result is a highly durable siding product that closely resembles natural wood while offering enhanced resistance to moisture, pests, and weather-related damage. Modern engineered wood siding products are specifically designed to address many of the weaknesses associated with traditional wood siding.

Is Engineered Wood Siding Right for Your Home?

Available in lap siding, panel siding, shakes, and board-and-batten styles, engineered wood siding can complement nearly any architectural design.

The Natural Beauty of Real Wood Without the Maintenance

One of the biggest reasons homeowners choose engineered wood siding is its appearance.

Many people love the warm, authentic look of cedar or traditional wood siding but are hesitant because of the ongoing maintenance requirements. Engineered wood siding is designed to replicate the grain patterns, texture, and character of real wood while significantly reducing upkeep needs.

Benefits include:

  • Realistic wood grain textures
  • Multiple profile options
  • Wide selection of factory-finished colors
  • Paintable surfaces for custom designs
  • Compatibility with modern, traditional, farmhouse, and craftsman-style homes

From a curb appeal standpoint, many homeowners find engineered wood siding provides a premium appearance that rivals natural wood at a lower cost.

Is Engineered Wood Siding Right for Your Home?

Exceptional Durability Against the Elements

Your siding must withstand years of exposure to rain, wind, sun, humidity, and fluctuating temperatures. One of the most significant benefits of engineered wood siding is its ability to handle challenging weather conditions.

Because the wood fibers are treated with protective resins, waxes, and additives during manufacturing, engineered wood siding is designed to resist:

  • Cracking
  • Splitting
  • Warping
  • Impact damage
  • Extreme temperature changes
  • Daily weather exposure

Many products are engineered specifically to perform in climates that experience both hot summers and cold winters. This enhanced durability helps homeowners avoid many of the issues commonly associated with natural wood siding.

Superior Moisture Resistance

Moisture is one of the leading causes of siding deterioration. Traditional wood siding can absorb water over time, leading to swelling, rot, mold growth, and structural damage.

Engineered wood siding is specifically manufactured to combat moisture-related problems. Protective coatings, resins, and moisture-resistant treatments help reduce water absorption and improve long-term performance.

Some of the moisture-related benefits include:

  • Reduced risk of rot
  • Better resistance to fungal growth
  • Improved protection against water infiltration
  • Less swelling and shrinking
  • Greater dimensional stability

While proper installation and maintenance remain important, engineered wood siding generally performs much better than traditional wood when exposed to moisture.

Excellent Resistance to Pests and Insects

Homeowners often worry about termites, carpenter ants, and other wood-destroying insects. Traditional wood siding can become vulnerable to pest infestations over time, especially if moisture problems develop.

Engineered wood siding is treated during manufacturing with additives that help deter insects and resist pest damage. Many products include protective treatments specifically designed to reduce the likelihood of termite-related deterioration.

This added protection can help lower long-term maintenance costs and reduce the risk of expensive repairs.

Lower Maintenance Than Traditional Wood

Natural wood siding requires regular staining, sealing, painting, and inspections to maintain its appearance and performance. For many homeowners, the maintenance demands become a significant drawback over time.

Engineered wood siding offers a much more manageable maintenance schedule.

Typical maintenance tasks include:

  • Annual cleaning
  • Periodic inspections
  • Repainting when necessary
  • Monitoring caulk and sealants around openings

Because the material is designed to resist many of the common issues that affect natural wood, homeowners often spend less time and money maintaining their exterior.

Is Engineered Wood Siding Right for Your Home?

More Affordable Than Natural Wood Siding

Cost plays a major role in any remodeling decision. Many homeowners are attracted to engineered wood siding because it offers the appearance of premium wood siding at a more budget-friendly price point.

Compared to traditional wood siding, engineered wood often provides:

  • Lower material costs
  • Reduced installation costs
  • Less long-term maintenance expense
  • Fewer repair costs over time

This combination of affordability and performance makes engineered wood siding an attractive option for homeowners who want high-end curb appeal without the premium price tag associated with natural cedar or other wood species.

Easier and Faster Installation

Another benefit of engineered wood siding is its relatively lightweight construction.

Compared to heavier siding materials such as fiber cement, engineered wood siding is easier for installers to handle and cut during installation. This can help streamline the installation process and potentially reduce labor costs.

Advantages of its lighter weight include:

  • Faster installation timelines
  • Easier handling on the jobsite
  • Reduced labor demands
  • Less stress on the home’s structure

When installed by experienced professionals, engineered wood siding can provide excellent performance while minimizing installation disruptions.

Environmentally Friendly Manufacturing

Many homeowners today want building materials that align with sustainability goals.

Engineered wood siding is often considered an environmentally responsible option because manufacturers frequently utilize wood fibers, wood strands, and recycled wood materials that might otherwise become waste. This helps maximize the use of harvested timber and reduce material waste.

Environmental benefits may include:

  • Efficient use of natural resources
  • Reduced manufacturing waste
  • Use of recycled wood fibers
  • Sustainable forestry sourcing practices

For homeowners looking to balance performance and environmental responsibility, engineered wood siding can be a strong choice.

Wide Variety of Design Options

No two homes are exactly alike. Fortunately, engineered wood siding offers extensive design flexibility.

Available options often include:

Siding Profiles

  • Lap siding
  • Panel siding
  • Vertical siding
  • Board-and-batten styles
  • Shake-style siding

Surface Textures

  • Cedar grain
  • Smooth finishes
  • Rustic textures
  • Traditional wood grain patterns

Color Choices

  • Factory-finished colors
  • Primed products ready for painting
  • Custom color matching options

This versatility allows homeowners to create a personalized exterior design that complements their home’s architecture and neighborhood aesthetic.

Strong Long-Term Value

When evaluating siding materials, it’s important to look beyond the initial installation cost and consider overall value.

Engineered wood siding provides value through several key factors:

  • Attractive appearance
  • Long lifespan
  • Reduced maintenance costs
  • Enhanced durability
  • Improved curb appeal
  • Potential boost in resale value

Is Engineered Wood Siding Right for Your Home?

Many engineered wood siding products also include substantial manufacturer warranties, providing additional peace of mind for homeowners. Some warranties extend up to 30 years depending on the product and manufacturer.

Is Engineered Wood Siding Right for Your Home?

Every home is different, and the ideal siding choice depends on your goals, budget, climate, and design preferences.

Engineered wood siding is often an excellent choice for homeowners who want:

  • The appearance of real wood
  • Better durability than traditional wood siding
  • Lower maintenance requirements
  • Improved resistance to moisture and pests
  • Greater affordability than natural wood
  • Long-term exterior protection

When properly installed and maintained, engineered wood siding can deliver decades of attractive performance while helping homeowners avoid many of the challenges associated with traditional wood products. Many modern engineered wood siding systems are designed to last 20 to 30 years or more, making them a dependable long-term investment.

Trust AAA Siding & Remodeling for Your Engineered Wood Siding Installation

At AAA Siding & Remodeling, we understand that replacing your siding is a major investment in your home’s future. Our team helps homeowners evaluate all available siding options and choose solutions that fit their needs, budget, and design goals.

Whether you’re interested in engineered wood siding, fiber cement siding, or vinyl siding, we provide expert guidance, professional installation, and quality craftsmanship that protects your home for years to come.

If you’re ready to enhance your home’s curb appeal and durability with engineered wood siding, contact AAA Siding & Remodeling by calling 816-421-5433 or reach out online today for a consultation and personalized estimate.

Frequently Asked Questions

1. How long does engineered wood siding last?

With proper installation and maintenance, engineered wood siding typically lasts 20 to 30 years or longer, depending on the product and local climate.

2. Is engineered wood siding better than vinyl siding?

Both materials offer benefits. Engineered wood siding generally provides a more natural appearance and greater impact resistance, while vinyl siding often requires less maintenance and may cost less upfront.

3. Does engineered wood siding need to be painted?

Many products come pre-finished, but engineered wood siding can also be painted. Repainting may be needed over time to maintain appearance and protection. 

4. Is engineered wood siding resistant to termites?

Yes. Most engineered wood siding products are treated to resist termites and other wood-damaging insects.

5. Can engineered wood siding increase home value?

High-quality siding upgrades can improve curb appeal, enhance protection, and make a home more attractive to potential buyers, potentially contributing to increased resale value.

Related Topics
Hardie Board Siding vs Vinyl Siding: Comparing Cost, Durability, and Value

Choosing new siding is one of the most important decisions you can make for your home’s exterior. Your siding impacts curb appeal, energy efficiency, maintenance requirements, weather protection, and long-term property value. Two of the most popular options available today are Hardie Board siding and vinyl siding.

Homeowners often find themselves comparing these materials because both offer advantages over traditional wood siding. However, they differ significantly in cost, appearance, durability, maintenance needs, and overall performance.

At AAA Siding & Remodeling, we help Missouri homeowners find the siding solution that best matches their goals, budget, and lifestyle. If you are trying to decide between Hardie Board and vinyl siding, this guide will walk you through the key differences so you can make an informed investment in your home.

What Is Hardie Board Siding?

Hardie Board is a fiber cement siding product manufactured by James Hardie. It is made from a combination of cement, sand, and cellulose fibers that create a durable, weather-resistant exterior material. Fiber cement siding has become increasingly popular because it offers the appearance of real wood while requiring far less upkeep.

Hardie Board is available in several styles, including:

  • Lap siding
  • Vertical panels
  • Shake siding
  • Board and batten designs
  • Multiple textures and colors

Many homeowners choose Hardie Board because it delivers a premium appearance and exceptional durability.

hardie board vs vinyl siding

What Is Vinyl Siding?

Vinyl siding is made from PVC, a durable plastic material designed to protect homes from moisture and weather exposure. It has been one of the most widely used siding materials in the United States for decades due to its affordability and low maintenance requirements. 

Modern vinyl siding comes in a wide variety of:

  • Colors
  • Profiles
  • Textures
  • Thickness levels
  • Insulated options

Today’s vinyl products are far more attractive and durable than earlier generations, making them a popular choice for budget-conscious homeowners.

Hardie Board vs Vinyl Siding: Quick Comparison

Feature Hardie Board Vinyl Siding
Material Fiber cement PVC plastic
Lifespan 30 to 50+ years 20 to 40 years
Maintenance Moderate Low
Fire Resistance Excellent Limited
Impact Resistance High Moderate
Appearance Premium, wood-like Good, varies by product
Installation Cost Higher Lower
Resale Value Higher potential Moderate
Painting May be needed over time Typically not required

While both options perform well, the right choice often depends on your priorities.

Cost Comparison: Which Option Is More Affordable?

For many homeowners, cost is the first factor they consider.

Vinyl siding remains one of the most affordable exterior cladding options available. Material and installation costs are generally lower because vinyl is lightweight, easier to transport, and faster to install. Hardie Board is heavier and requires specialized installation techniques, which increases labor costs.

Typical Cost Considerations

Vinyl Siding

  • Lower upfront investment
  • Faster installation
  • Lower labor expenses
  • Widely available products

Hardie Board

  • Higher material costs
  • Increased installation labor
  • Longer installation timeline
  • Premium exterior finish

Although Hardie Board typically costs more initially, many homeowners view it as a long-term investment because of its durability and longevity.

Durability and Lifespan

When comparing Hardie Board vs vinyl siding, durability is one of the biggest differences.

Hardie Board is engineered to withstand harsh weather, moisture, temperature fluctuations, and physical impacts. Because it contains cement, it is less likely to crack, warp, or sustain damage from hail and flying debris. Many fiber cement products can last 40 to 75 years with proper maintenance.

Vinyl siding is also durable but has limitations. Extreme cold can make vinyl more brittle, while prolonged heat exposure may cause warping. High winds and impact from hail or debris can occasionally damage panels. Quality vinyl siding can still provide decades of reliable performance when properly installed.

Durability Winner

If maximum durability is your top priority, Hardie Board generally has the advantage.

hardie board vs vinyl siding

Weather Resistance

Your siding must protect your home through every season.

Both products resist moisture and perform well in a variety of climates, but they respond differently to weather extremes.

Hardie Board performs exceptionally well in:

  • Heavy rain
  • High winds
  • Snow and ice
  • Humid environments
  • Coastal conditions

Vinyl siding also handles moisture effectively and will not rot like wood. However, it may become more susceptible to cracking in extremely cold temperatures and can warp when exposed to intense heat.

For homeowners living in areas that experience severe weather, fiber cement often provides greater peace of mind.

Fire Resistance

One category where Hardie Board clearly stands out is fire resistance.

Because fiber cement contains cement and sand, it is considered non-combustible and offers excellent fire protection. Many homeowners appreciate this feature, particularly in areas where fire safety is a concern.

Vinyl siding is treated to resist fire spread, but it can melt or warp when exposed to high heat. While it does not necessarily ignite easily, it does not provide the same level of protection as fiber cement.

Fire Resistance Winner

Hardie Board is the clear choice for homeowners prioritizing fire safety.

Appearance and Curb Appeal

A home’s exterior plays a major role in first impressions and property value.

Many homeowners prefer Hardie Board because it closely resembles natural wood. Its thicker profile creates deeper textures and more realistic grain patterns, giving homes a high-end appearance. Fiber cement is often selected for luxury homes and historic-style architecture.

Vinyl siding has improved significantly over the years and is available in many attractive styles. Premium vinyl products can mimic wood grain and other textures surprisingly well. However, many homeowners still feel that Hardie Board offers a more authentic and upscale appearance.

Appearance Winner

For premium curb appeal, Hardie Board typically comes out ahead.

Maintenance Requirements

Maintenance is where vinyl siding shines.

Most vinyl siding simply requires occasional washing to remove dirt and debris. Because the color is integrated throughout the material, homeowners rarely need to paint it.

Hardie Board is also relatively low maintenance compared to wood siding, but it may eventually require:

  • Repainting
  • Caulking touch-ups
  • Periodic inspections
  • Routine cleaning

Although these maintenance needs are not extensive, they are generally greater than those of vinyl siding.

Maintenance Winner

Vinyl siding offers the easiest long-term upkeep.

hardie board vs vinyl siding

Energy Efficiency

Neither standard Hardie Board nor traditional vinyl siding is known primarily for insulation value. Energy efficiency often depends more on the wall assembly behind the siding, including house wrap, insulation, and installation quality.

That said, insulated vinyl siding options can provide additional thermal performance, helping reduce heat transfer and potentially improve comfort.

When installed correctly, both products can contribute to an energy-efficient exterior system.

Resale Value and Return on Investment

Homeowners frequently ask which siding material adds more value to their home.

Hardie Board often appeals to buyers because of its premium appearance, durability, and reputation for long-term performance. As a result, it may contribute more strongly to resale value in many markets.

Vinyl siding also provides excellent value, particularly because of its lower initial cost. Buyers appreciate its low maintenance requirements and affordability.

Ultimately, both materials can improve home value when professionally installed, but Hardie Board is often viewed as the higher-end upgrade.

Which Siding Is Best for Your Home?

The right answer depends on your priorities.

Choose Hardie Board If You Want:

  • Maximum durability
  • Premium curb appeal
  • Superior fire resistance
  • Long-term investment value
  • Enhanced weather protection

Choose Vinyl Siding If You Want:

  • Lower upfront costs
  • Minimal maintenance
  • Faster installation
  • Wide style and color selection
  • Excellent overall value

Many homeowners find that vinyl siding delivers everything they need at a budget-friendly price point. Others prefer to invest more upfront for the premium benefits offered by Hardie Board.

What Homeowners Are Saying

Across homeowner communities and industry discussions, many people praise Hardie Board for its appearance, durability, and long lifespan. At the same time, many homeowners continue to choose vinyl because of its affordability and low maintenance benefits. Community discussions often show that the decision ultimately comes down to budget, maintenance preferences, and long-term goals.

hardie board vs vinyl siding

Trust AAA Siding & Remodeling for Expert Guidance

Whether you choose Hardie Board or vinyl siding, professional installation is essential to maximizing performance and longevity. Even the best siding products can underperform if they are not installed correctly.

At AAA Siding & Remodeling, our experienced team helps homeowners evaluate their options, understand the pros and cons of each material, and select the siding solution that best fits their home and budget.

We offer expert siding consultations, quality craftsmanship, and premium products designed to protect and beautify your home for years to come.

If you are considering a siding replacement project, contact AAA Siding & Remodeling by calling 816-421-5433 or reach out online today to learn more about Hardie Board and vinyl siding options and receive a free estimate.

FAQ: Hardie Board Siding vs Vinyl Siding: Comparing Cost, Durability, and Value

1. Is Hardie Board more expensive than vinyl siding?

Yes. Hardie Board generally has higher material and installation costs due to its weight, durability, and specialized installation requirements.

2. How long does Hardie Board siding last?

With proper installation and maintenance, Hardie Board can last 30 to 50 years or more.

3. Does vinyl siding require painting?

No. Most vinyl siding comes with color built into the material, eliminating the need for painting.

4. Which siding is better for severe weather?

Hardie Board typically performs better in extreme weather conditions because of its strength and impact resistance.

5. Does Hardie Board increase home value?

Many homeowners and real estate professionals view Hardie Board as a premium exterior upgrade that can positively impact resale value.

Related Topics
When to Replace Vinyl Siding on Your Home

10 Signs You Need to Replace Vinyl Siding Before Bigger Problems Start

Your home’s siding does much more than improve curb appeal. It protects your house from moisture, wind, pests, and changing temperatures while helping maintain energy efficiency year-round. Vinyl siding has long been a popular option because it is durable, affordable, and low maintenance. However, even quality siding eventually reaches the end of its lifespan.

Many homeowners ignore early warning signs because the damage develops gradually. Small cracks, fading, or loose panels may not seem urgent at first, but these issues can quickly lead to water damage, mold growth, insulation problems, and costly structural repairs if left untreated.

At AAA Siding & Remodeling, we help homeowners throughout the Kansas City metro area identify siding problems early and choose replacement solutions that improve both protection and appearance. With more than 25 years of exterior remodeling experience and recognition as a James Hardie Elite Preferred Contractor, our team understands how Midwest weather affects siding performance over time. 

If you are wondering whether your siding needs simple repairs or a full replacement, here are the most common signs to watch for.

1. Cracks, Holes, or Visible Damage

One of the clearest signs your vinyl siding needs replacement is obvious physical damage. Small cracks or holes may not seem serious initially, but even minor openings can allow moisture behind the siding panels.

Over time, this trapped moisture can lead to:

  • Mold and mildew growth
  • Wood rot beneath the siding
  • Interior water damage
  • Higher energy bills
  • Pest infestations

Vinyl siding naturally expands and contracts with temperature changes. Years of exposure to heat, cold, hail, and strong winds can weaken the material and cause cracking or splitting.

If the damage is isolated to one area, repairs may still be possible. However, widespread cracking across multiple sections usually indicates the siding is aging and losing its structural integrity.

2. Warping or Buckling Panels

Warped siding panels are another major red flag. Vinyl siding should lay flat against your home. If panels appear wavy, bent, or bubbled, it often means moisture has become trapped underneath or the siding was exposed to excessive heat.

Buckling can happen for several reasons:

  • Poor original installation
  • Long-term moisture intrusion
  • Heat damage from reflected sunlight
  • Aging materials losing flexibility

Warping does not just affect appearance. It can compromise your home’s protective barrier and allow water to seep into the walls.

Homeowners sometimes notice this problem after storms or during seasonal temperature swings. If large portions of your siding are buckling, replacement is usually the most reliable long-term solution.

3. Fading or Severe Discoloration

Vinyl siding naturally fades over time due to sun exposure. While some color change is expected after many years, excessive fading can indicate your siding is nearing the end of its lifespan.

When siding loses its color protection, it often becomes more brittle and vulnerable to cracking. Severe fading can also reduce curb appeal and make your home appear older than it is.

Look for:

  • Uneven color changes
  • Chalky residue on the surface
  • Sections that appear washed out
  • Sun-damaged areas facing direct sunlight

Modern siding products offer improved UV resistance and longer-lasting color technology compared to older vinyl materials. Upgrading your siding can dramatically refresh your home’s appearance while improving durability.

When to Replace Vinyl Siding on Your Home

4. Rising Energy Bills

If your heating and cooling costs continue increasing without another obvious explanation, your siding could be part of the problem.

Old or damaged siding may allow outside air to enter your home through gaps, cracks, or weakened insulation layers. This forces your HVAC system to work harder to maintain indoor comfort.

Poor siding performance often leads to:

  • Drafty rooms
  • Uneven indoor temperatures
  • Reduced insulation efficiency
  • Increased heating and cooling expenses

Replacing outdated siding with modern insulated products can improve energy efficiency and help stabilize utility costs throughout the year.

At AAA Siding & Remodeling, homeowners can choose from durable siding options designed specifically for Midwest weather conditions, including vinyl and fiber cement siding systems that improve protection and efficiency. 

5. Mold, Mildew, or Fungus Growth

Mold and mildew growing on your siding may indicate more than surface dirt. Persistent growth can signal trapped moisture behind the panels.

Pay close attention to:

  • Green or black streaks
  • Fungal growth near seams
  • Mold around corners or lower walls
  • Persistent mildew after cleaning

Moisture problems behind siding can spread quickly into the home’s framing and insulation. If caught early, isolated areas may be repairable. However, recurring mold growth often means water intrusion has already become a larger issue.

A professional siding inspection can determine whether replacement is necessary to fully resolve the problem.

6. Loose or Missing Panels

Strong winds and severe weather can loosen siding panels over time. Once panels begin separating from the home, your exterior becomes vulnerable to water penetration and additional storm damage.

Missing siding panels expose the underlayment directly to moisture and UV exposure. Even a single missing section can eventually lead to:

  • Rotting wood sheathing
  • Interior leaks
  • Insect damage
  • Reduced insulation performance

Loose panels may also indicate the siding fastening system has weakened with age. In older homes, matching replacement panels can be difficult because manufacturers discontinue certain styles and colors over time.

If multiple areas are becoming loose or detached, full replacement often provides a more consistent and durable result.

7. Frequent Repairs Are Adding Up

Occasional siding repairs are normal, especially after storms. However, constant patching becomes expensive and frustrating over time.

You may want to consider replacement if you find yourself repeatedly dealing with:

  • Cracked panels
  • Loose sections
  • Moisture issues
  • Repainting or cleaning
  • Recurring mold growth

At a certain point, investing in a complete siding replacement becomes more cost-effective than continuing temporary fixes.

New siding also gives homeowners the opportunity to modernize their home’s appearance, improve energy efficiency, and reduce future maintenance needs.

When to Replace Vinyl Siding on Your Home

8. Interior Water Damage or Peeling Paint

Sometimes siding problems become noticeable inside the home before exterior damage is obvious.

Watch for interior warning signs such as:

  • Peeling wallpaper
  • Bubbling paint
  • Water stains on walls
  • Soft drywall
  • Musty odors

These issues may indicate moisture is entering through failing siding and affecting the interior structure.

Water intrusion should never be ignored because it can lead to mold growth and expensive structural repairs. Replacing damaged siding promptly can help protect both the exterior and interior of your home.

9. Your Siding Is More Than 20 Years Old

Vinyl siding can last for decades, but age eventually takes a toll. Older siding materials may become brittle, faded, and less weather resistant over time.

The exact lifespan depends on factors like:

  • Installation quality
  • Climate exposure
  • Storm damage history
  • Maintenance practices
  • Material quality

In areas with intense seasonal weather changes like Kansas City, siding often experiences additional stress from temperature fluctuations, wind, and storms.

If your siding is approaching or exceeding 20 years old, it may be time to schedule a professional inspection to evaluate its condition.

At AAA Siding & Remodeling, our experienced team helps homeowners determine whether repairs are sufficient or if replacement will provide better long-term value. Since 1998, we have specialized in exterior remodeling solutions designed for homes throughout Missouri and Kansas. 

10. You Want Better Curb Appeal and Home Value

Sometimes siding replacement is not just about damage. Many homeowners decide to replace older vinyl siding simply to improve the look and value of their home.

New siding can dramatically transform your property by:

  • Updating outdated colors
  • Improving architectural style
  • Increasing resale value
  • Enhancing curb appeal
  • Creating a more modern appearance

Today’s siding products offer more design flexibility than ever before, including realistic wood grain textures, bold colors, and enhanced durability.

If you plan to sell your home in the future, updated siding can make a strong first impression on potential buyers.

When to Replace Vinyl Siding on Your Home
Siding, plastic panels texture closeup in the daytime outdoors

Repair vs. Replacement: How to Decide

Not every siding issue requires complete replacement. Minor storm damage or isolated cracks can sometimes be repaired successfully. The key is understanding when repairs are no longer enough.

Repairs May Work If:

  • Damage is limited to one small section
  • The siding is relatively new
  • Moisture has not penetrated underneath
  • Matching materials are still available

Replacement Is Often Better If:

  • Damage appears in multiple areas
  • The siding is old and brittle
  • Moisture problems are widespread
  • Repairs are becoming frequent
  • Energy efficiency has declined

A professional inspection can help determine the most practical and cost-effective option for your home.

Benefits of Replacing Vinyl Siding

Replacing worn-out siding does more than fix visible problems. It also provides long-term advantages for homeowners.

Improved Protection

New siding creates a stronger barrier against wind, rain, pests, and moisture intrusion.

Better Energy Efficiency

Modern siding systems can improve insulation and help reduce heating and cooling costs.

Lower Maintenance

Today’s siding products require less upkeep and resist fading, cracking, and weather damage more effectively.

Enhanced Appearance

Fresh siding instantly boosts curb appeal and modernizes your home’s exterior.

Increased Home Value

Exterior upgrades often improve resale value and attract more buyer interest.

When to Replace Vinyl Siding on Your Home

Choosing the Right Replacement Siding

If your current vinyl siding needs replacement, this is the perfect opportunity to explore modern siding materials and styles.

Popular options include:

Each material offers different advantages depending on your budget, maintenance preferences, and aesthetic goals.

At AAA Siding & Remodeling, homeowners can choose from premium siding options including vinyl, wood, and James Hardie fiber cement products designed for long-lasting durability and curb appeal.

Why Homeowners Trust AAA Siding & Remodeling

Choosing the right contractor is just as important as choosing the right siding material.

For more than 25 years, AAA Siding & Remodeling has helped homeowners throughout the Kansas City metro area improve their homes with professional exterior remodeling services. As a family-owned company and one of the first James Hardie Elite Preferred Contractors in Missouri and Kansas, we are committed to quality craftsmanship and customer satisfaction. 

Our team works closely with homeowners to identify siding issues, recommend the best solutions, and complete installations with precision and care.

Whether your siding has visible damage or you simply want a fresh new look for your home, we are here to help you protect your investment for years to come. Contact our team online or call 816-421-5433 to schedule a free estimate today!

FAQ: When to Replace Vinyl Siding on Your Home

How long does vinyl siding typically last?

Most vinyl siding lasts between 20 and 40 years depending on installation quality, climate conditions, and maintenance.

Can damaged vinyl siding be repaired instead of replaced?

Yes, small isolated issues can often be repaired. However, widespread damage, moisture problems, or aging siding may require full replacement.

What causes vinyl siding to warp?

Warping is commonly caused by trapped moisture, excessive heat exposure, improper installation, or aging materials.

Does replacing siding increase home value?

Yes, new siding can improve curb appeal, energy efficiency, and resale value while making the home more attractive to buyers.

What siding options does AAA Siding & Remodeling offer?

AAA Siding & Remodeling offers vinyl, wood, and fiber cement siding solutions, including premium James Hardie products designed for long-term durability. 

Related Topics
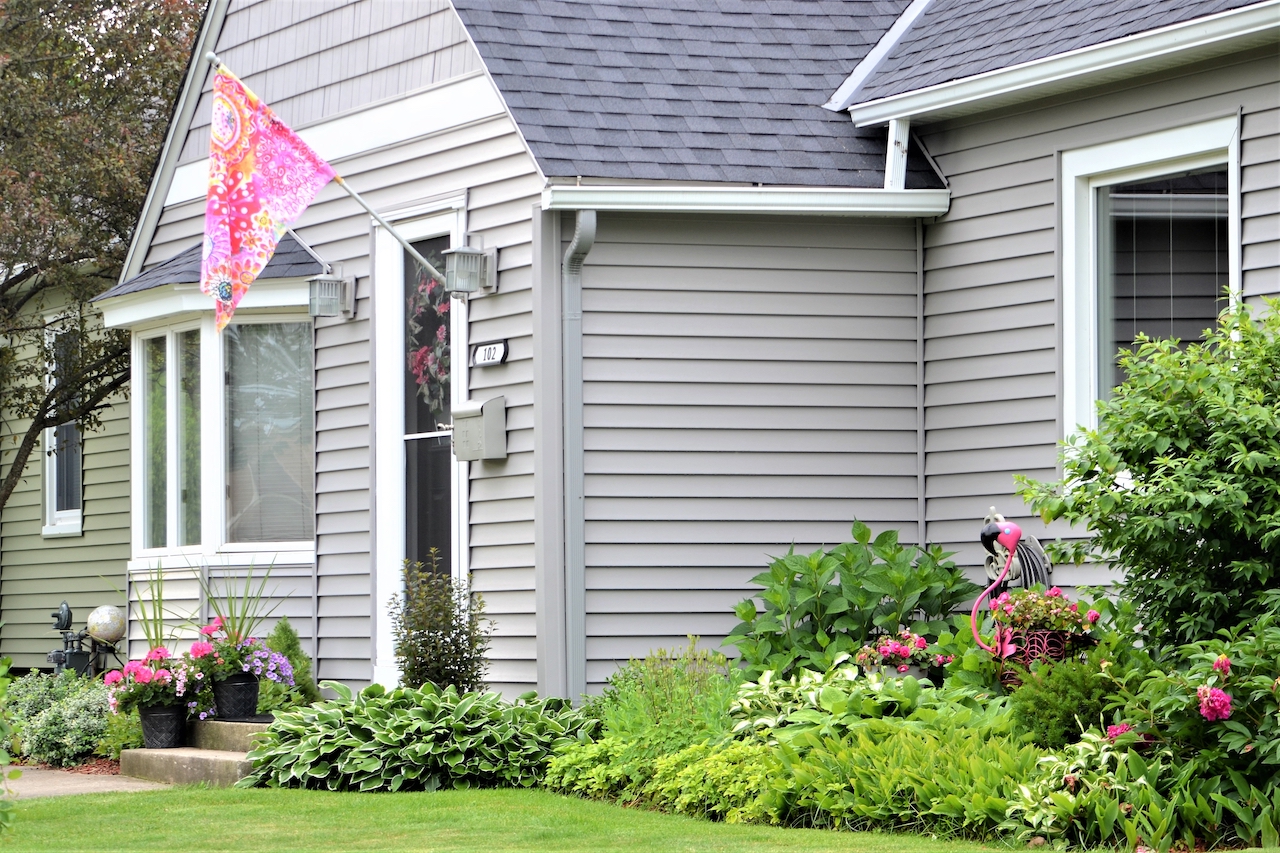
 

Why a Storm Door is Your Kansas City Home’s Best Friend
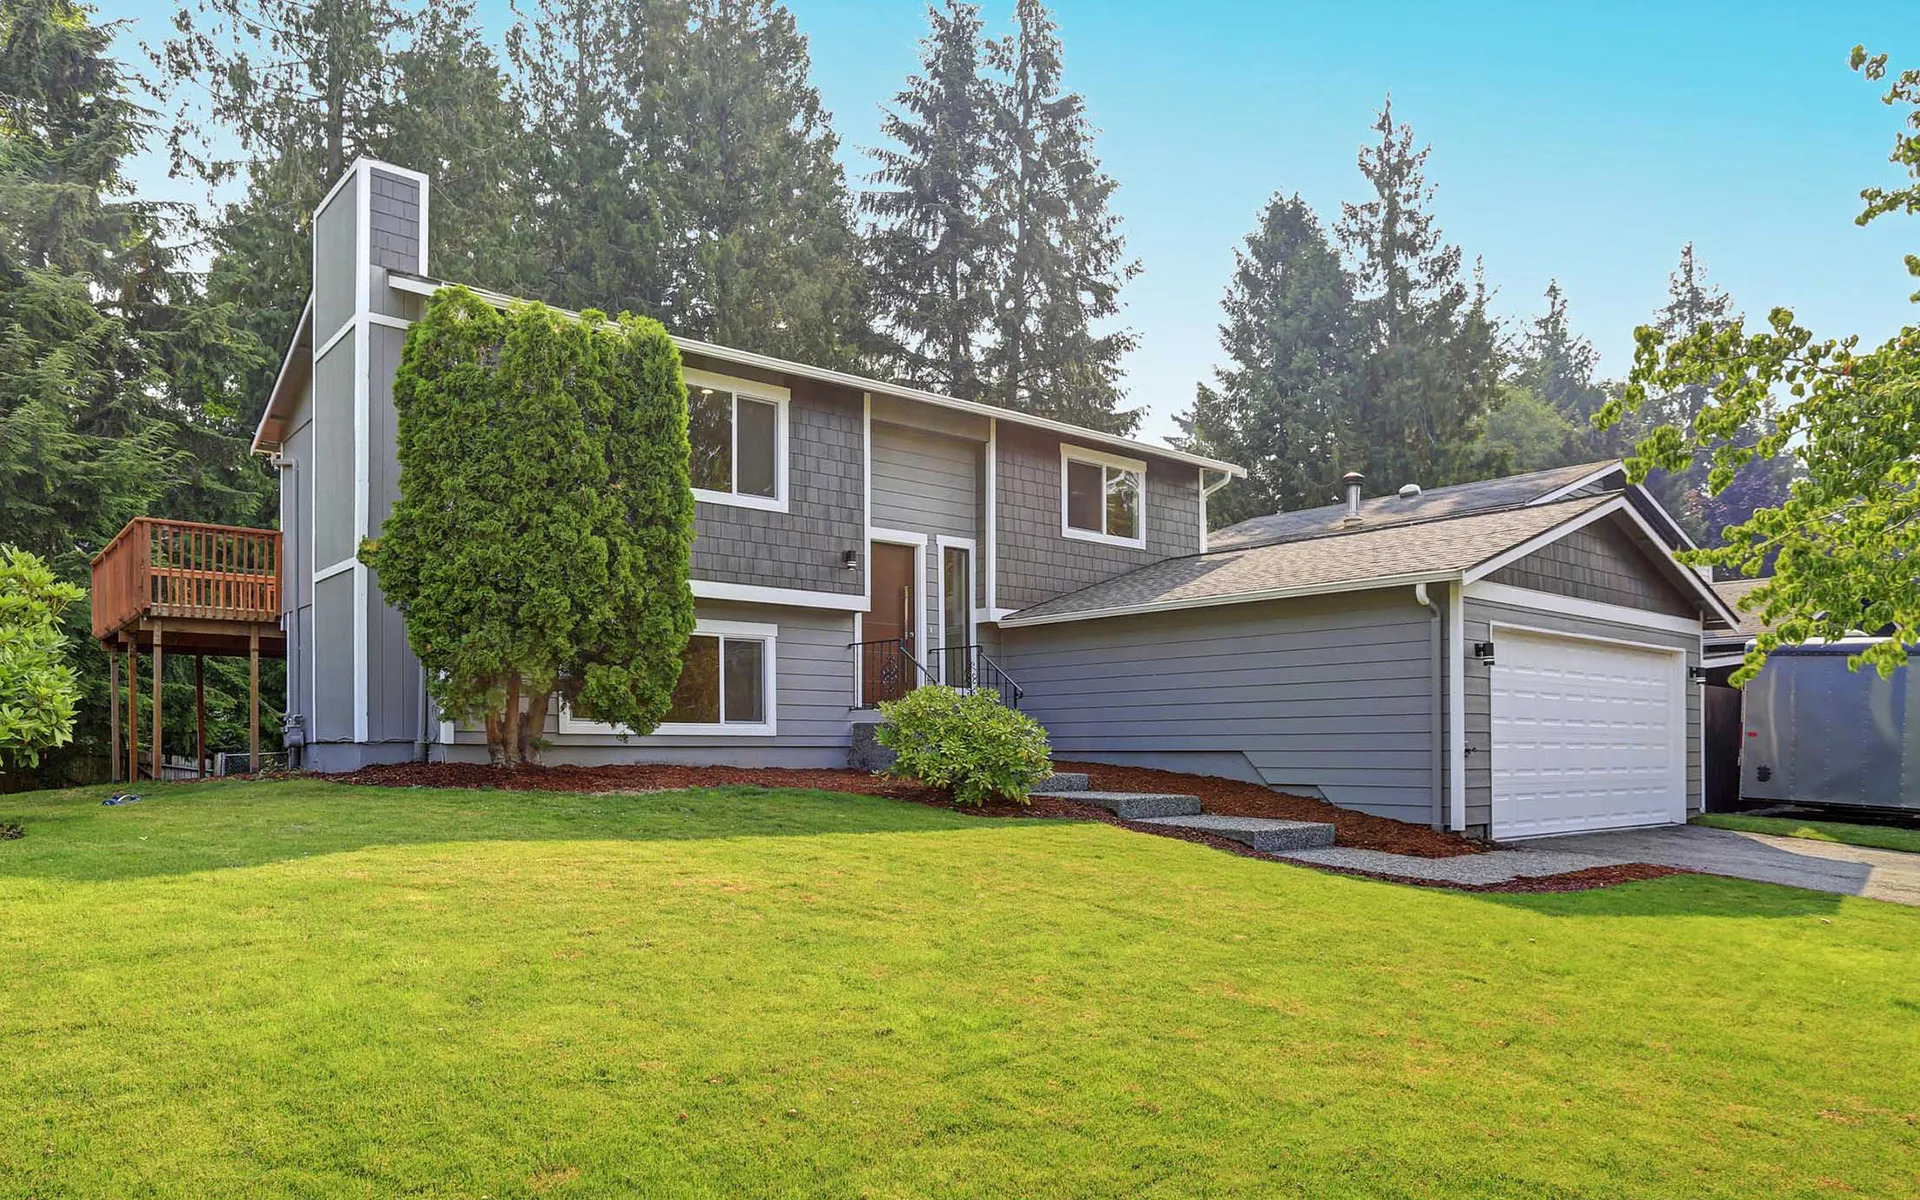
I can’t tell you how many homeowners I’ve met who spend thousands on a beautiful new front door, only to see it get damaged by our unpredictable weather within a couple of years. That’s where storm doors come in. Honestly, they’re one of the smartest investments you can make for your home. Let me tell you why.

What Storm Doors Really Do for Your Home

Think of a storm door as your front door’s bodyguard. It sits right there in front of your main entry door, taking all the punishment that Kansas City weather wants to dish out. And you know our weather dishes out plenty!

I’ve seen gorgeous wooden doors warped and cracked because they didn’t have that extra layer of protection. I’ve seen homeowners dealing with drafts so bad they might as well have left their windows open in January. And don’t get me started on the energy bills – some folks are literally throwing money out the door because they don’t have proper protection.

When we install a quality storm door – and I’m talking about the good stuff from manufacturers like Pella – it creates an insulating air pocket between your main door and the outside world. It’s like giving your home a thermal jacket. Your heating and cooling systems don’t have to work nearly as hard, and you’ll see that reflected in your utility bills.

Winter: When Storm Doors Really Shine

Let me paint you a picture. It’s February, it’s 15 degrees outside with a wind chill that makes it feel like ten below, and there’s ice on everything. Without a storm door, all that bitter cold is trying its hardest to sneak into your house through every little gap around your main door. Even if you think your door fits tight, I guarantee there are spots where cold air is getting through.

I remember working on a house in Overland Park a few winters back. The homeowners were complaining about this cold draft in their entryway that made the whole front of their house uncomfortable. They were cranking up the heat and still couldn’t get warm. We installed a good storm door with proper weatherstripping, and the difference was night and day.

Here’s something most people don’t think about: moisture. When warm air from inside your house meets that cold air coming in around your door, you get condensation. Over time, that moisture wreaks havoc on your door frame, your flooring, even your drywall. I’ve seen rot damage that cost homeowners thousands to repair, all because they didn’t have that extra barrier protection.

A good storm door with tight seals keeps all that moisture out. Plus, on those sunny winter days – and we do get them here in Kansas City – the glass in your storm door acts like a little greenhouse, letting that solar heat warm up your entryway naturally.

Summer Weather: More Than Just Heat

Summer in Kansas City isn’t just about the heat. We get sudden thunderstorms that can drop baseball-sized hail in a matter of minutes. I’ve seen storm doors with tempered glass take direct hits from hail that would have shattered regular door glass or dinged up a wooden door.

Let’s talk about those UV rays. The sun here in the Midwest is intense during summer months. I’ve seen beautiful stained wood doors fade to nothing in just a couple of seasons because they didn’t have UV protection. A storm door with the right glass coatings blocks those harmful rays, keeping your main door looking good for years longer.

But here’s one of my favorite features of modern storm doors: the ventilation options. Most of the good ones come with retractable screens that let you open up your main door for fresh air while still maintaining security and keeping the bugs out. During those perfect spring and fall evenings when you want to let the breeze through, you can do it safely.

It’s like having a screened porch right at your front door. You can enjoy the evening air without worrying about security or letting in half the mosquito population.

Security: An Added Bonus You’ll Appreciate

I’m primarily a siding and exterior guy, but I can’t ignore the security benefits of a good storm door. These aren’t the flimsy aluminum doors your grandparents might have had. Today’s storm doors have multi-point locking systems, reinforced frames, and impact-resistant glass.

Think about it – if someone with bad intentions approaches your house, they now have to get through two doors instead of one. That’s a significant deterrent right there. Plus, with the large glass panels on most storm doors, you can see who’s at your door before you even think about opening your main door.

I’ve had several customers tell me they feel more secure, especially when they’re home alone. You can talk to delivery drivers, neighbors, or salespeople through the storm door and decide whether you want to open your main door at all.

Choosing the Right Storm Door for Kansas City

Not all storm doors are created equal, and what works great in Arizona might not be the best choice for our climate.

Full-view doors – mostly glass – look fantastic and let in maximum light. But in our climate, you’re giving up some insulation value. They’re still better than no storm door at all, but if energy efficiency is your main concern, you might want to consider a mid-view or high-view door that has more solid material for insulation.

Material choice is huge. Aluminum frames are my go-to recommendation for most Kansas City homes. They don’t rust, they handle our humidity well, and they require almost no maintenance. You’ve got better things to do than constantly maintaining your storm door.

Wood frames look beautiful – I won’t lie about that – but in our climate, you’re signing up for regular maintenance. The humidity in summer and the freeze-thaw cycles in winter are tough on wood. If you love the look and don’t mind the upkeep, go for it, but know what you’re getting into.

Fiberglass and vinyl composite frames are a nice middle ground. They’re durable, handle our weather well, and need minimal maintenance. They might cost a bit more upfront than aluminum, but they can be worth it if you want something that looks more substantial.

The Installation Makes All the Difference

Here’s something I need to stress: the best storm door in the world won’t do you any good if it’s not installed properly. I’ve seen expensive doors that performed terribly because they weren’t properly fitted. Gaps around the frame, drooping weatherstripping, doors that don’t close tightly – all of that defeats the purpose.

At AAA Siding & Remodeling, we measure twice and install once. We make sure everything is square, level, and properly sealed. We use quality hardware and weatherstripping, and we test everything before we consider the job done.

I’ve been called in to fix installations that other contractors botched, and it’s always more expensive to fix than it would have been to do it right the first time. When you’re investing in a storm door, make sure you’re working with someone who knows what they’re doing.

Real Talk About Return on Investment

Let’s be honest about money, because that’s what it often comes down to. A quality storm door isn’t the cheapest home improvement you can make, but it’s one of the smartest.

First, you’re protecting your main door, which could be worth anywhere from several hundred to several thousand dollars. I’ve seen storm doors add five to ten years to the life of a main door easily.

Second, the energy savings are real. I can’t give you exact numbers because every house is different, but most of my customers notice a difference in their heating and cooling bills. Over the life of the door, those savings add up.

Third, if you ever sell your house, a quality storm door is one of those features that buyers notice and appreciate. It shows that you’ve taken care of the home and thought about practical improvements.

Why We Partner with Pella

We’ve worked with a lot of manufacturers over the years, and there’s a reason we partner with Pella for our storm doors. They understand Midwest weather because they’ve been dealing with it for decades. Their doors are engineered specifically for climates like ours. The quality control is consistent, the warranty coverage is solid, and when there’s an issue, they stand behind their products.

Making the Decision

If you’re reading this, you are probably thinking about adding or replacing a storm door. If you are on the fence about it, consider this: it’s one of the few home improvements that protects your investment while making your home more comfortable and potentially saving you money.

We’ve been serving the Kansas City area for years, and we’ve seen how much difference a good storm door can make. If you’re ready to give your front door the protection it deserves, give us a call at 816-421-5433 or reach out through our online contact form.

We’re always happy to come take a look at your situation and give you an honest assessment. No high-pressure sales tactics, just straight talk from someone who’s been in the business long enough to know what works in Kansas City’s challenging climate.

Your home deserves the best protection you can give it, and sometimes that protection comes in the form of something as simple – and as effective – as a quality storm door.

Related Window Topics